Display Local Notifications In A NativeScript Application With Angular
A while back I wrote a tutorial that demonstrated how to use local notifications in a NativeScript Core project, also referred to as a vanilla NativeScript project. Since writing that tutorial I had received several requests to demonstrate the same in a NativeScript with Angular project.
If you’re unfamiliar, local notifications are scheduled notifications rather than notifications sent from a server. These notifications are useful when you need to trigger reminders in your application or based on events. For example, maybe you develop an iBeacon application and as you approach an iBeacon you want to receive a notification. This type of notification would be a local notification.
We’re going to see how to schedule and display notifications in Android and iOS using NativeScript and Angular.
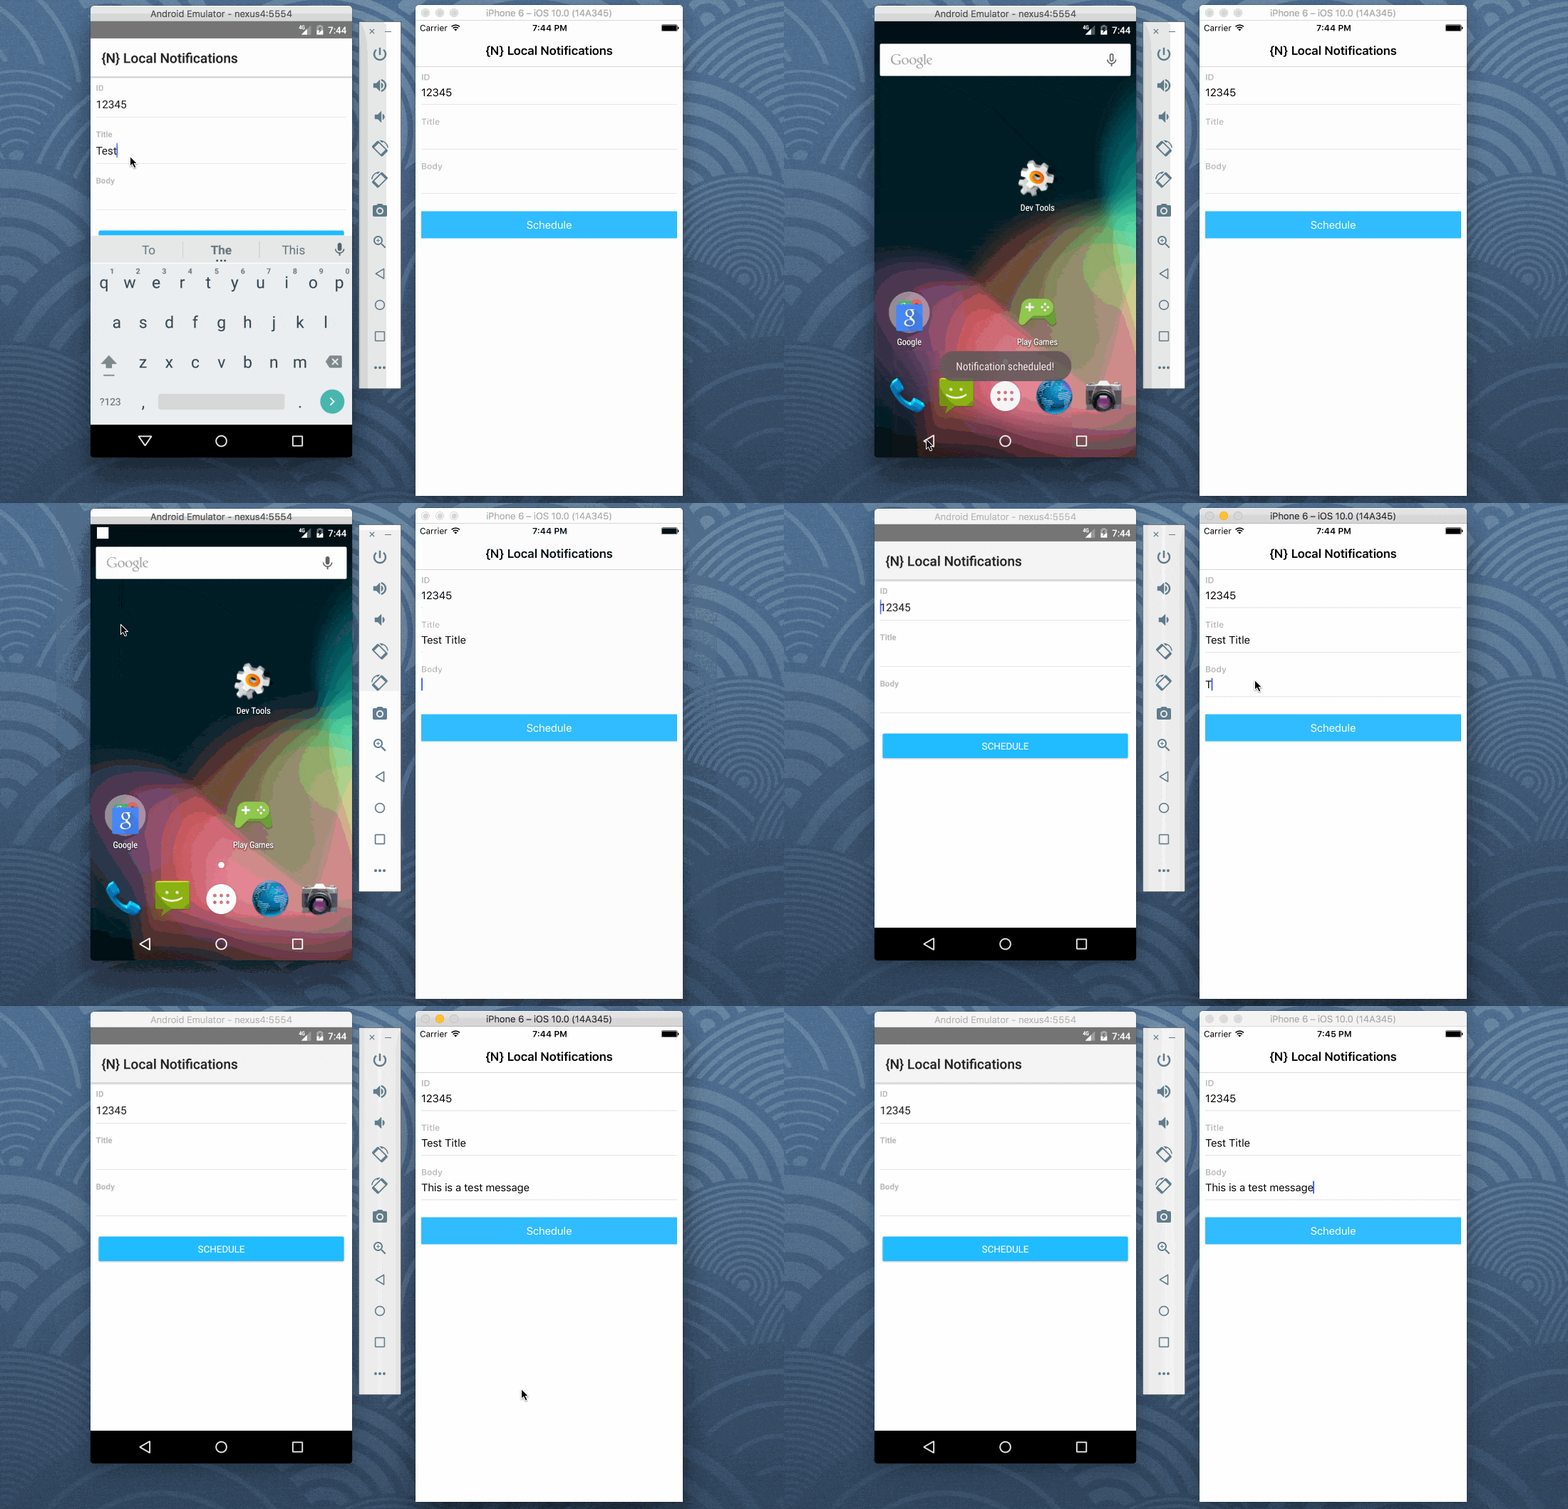
To keep things simple, we’re going to build the same application as seen in the previous example, but this time with a more polished user interface and Angular.

In the above animated image, we provide information to be shown in a notification. Ten seconds later, the notification is presented to the user. If the application is closed, the notification appears in the notification tray, but if the application is in the foreground, the notification displays as a dialog alert.
So how do we do this?
Create a NativeScript with Angular Project
For simplicity, let’s create a fresh NativeScript with Angular project. Assuming the NativeScript CLI is installed and configured, execute the following command:
tns create notification-project --ng
The --ng flag in the above command indicates we are creating an Angular project, not a NativeScript Core project.
This project will be using the NativeScript Local Notification plugin created by Eddy Verbruggen. From the command line, execute the following command:
tns plugin add nativescript-local-notifications
With the project created and the plugin installed for Android and iOS, we can start developing the application with TypeScript and XML.
Scheduling and Responding to Local Notifications
The concept behind what we are trying to accomplish is simple. Schedule a notification for a certain time, and respond when the message is received.
Open the project’s app/app.component.ts file and include the following TypeScript code:
import { Component, OnInit } from "@angular/core";
import * as Dialogs from "ui/dialogs";
import * as LocalNotifications from "nativescript-local-notifications";
import * as Toast from "nativescript-toast";

@Component({
    selector: "ns-app",
    templateUrl: "app.component.html",
})
export class AppComponent implements OnInit {

    public input: any;

    public constructor() {
        this.input = {
            "id": "12345",
            "title": "",
            "body": ""
        };
    }

    public ngOnInit() {
        LocalNotifications.addOnMessageReceivedCallback(notificationData => {
                Dialogs.alert({
                    title: "Notification received",
                    message: "ID: " + notificationData.id +
                    "\nTitle: " + notificationData.title +
                    "\nBody: " + notificationData.body,
                    okButtonText: "Excellent!"
                });
            }
        );
    }

    public schedule() {
        LocalNotifications.requestPermission().then(granted => {
            if(granted) {
                LocalNotifications.schedule([{
                    id: this.input.id,
                    title: this.input.title,
                    body: this.input.body,
                    at: new Date(new Date().getTime() + (10 * 1000))
                }]).then(() => {
                    Toast.makeText("Notification scheduled!").show();
                }, error => {
                    console.dir(error);
                });
            }
        });
    }

}
There are a few important things happening in the above code.
In the constructor method we are initializing an object which will hold user input. This object will be used to populate the notification with information.
public ngOnInit() {
    LocalNotifications.addOnMessageReceivedCallback(notificationData => {
            Dialogs.alert({
                title: "Notification received",
                message: "ID: " + notificationData.id +
                "\nTitle: " + notificationData.title +
                "\nBody: " + notificationData.body,
                okButtonText: "Excellent!"
            });
        }
    );
}
After the component initializes, we establish a callback for when a local notification message is received. When the application is in the foreground, this callback will trigger and display a notification.
To schedule local notifications, we’d have something like this:
public schedule() {
    LocalNotifications.requestPermission().then(granted => {
        if(granted) {
            LocalNotifications.schedule([{
                id: this.input.id,
                title: this.input.title,
                body: this.input.body,
                at: new Date(new Date().getTime() + (10 * 1000))
            }]).then(() => {
                Toast.makeText("Notification scheduled!").show();
            }, error => {
                console.dir(error);
            });
        }
    });
}
On iOS we have to ask for permission to display notifications. On Android this will always be true, but if true on iOS, we try to schedule the notification based on the user input.
In this example the schedule is ten seconds from the current timestamp. Once scheduled, we show a Toast notification. More information on Toast notifications can be seen in a previous article I wrote titled, Display Toast Notifications in a NativeScript Angular Application.
The corresponding NativeScript XML is very simple. Open the project’s app/app.component.html file and include the following markup:
<ActionBar title="{N} Local Notifications"></ActionBar>
<ScrollView>
    <StackLayout class="form">
        <StackLayout class="input-field">
            <Label text="ID" class="label font-weight-bold m-b-5"></Label>
            <TextField class="input" [(ngModel)]="input.id"></TextField>
            <StackLayout class="hr-light"></StackLayout>
        </StackLayout>
        <StackLayout class="input-field">
            <Label text="Title" class="label font-weight-bold m-b-5"></Label>
            <TextField class="input" [(ngModel)]="input.title"></TextField>
            <StackLayout class="hr-light"></StackLayout>
        </StackLayout>
        <StackLayout class="input-field">
            <Label text="Body" class="label font-weight-bold m-b-5"></Label>
            <TextField class="input" [(ngModel)]="input.body"></TextField>
            <StackLayout class="hr-light"></StackLayout>
        </StackLayout>
        <StackLayout class="input-field">
            <Button class="btn btn-primary w-full" text="Schedule" (tap)="schedule()"></Button>
        </StackLayout>
    </StackLayout>
</ScrollView>
Essentially we only have a form with a button that calls our schedule function from the TypeScript code.
Conclusion
You just saw how to schedule and display local notifications in an Android and iOS application built with NativeScript and Angular. This is a followup to a previous article I wrote on the topic for NativeScript Core titled, Using Local Notifications in Your NativeScript Mobile App.
Local notifications are very different than push notifications in the sense that your application is scheduling them rather than some remote server.

