Include A Hamburger Menu In A NativeScript Android And iOS Application
Most, not all, Android and iOS applications follow a similar set of rules when it comes to user experience. For example, many applications make use of what can be referred to as a hamburger menu in the top left or right hand side of the screen. These hamburger menus look like three horizontal lines and are useful for bringing up some sort of menu, typically from either of the sides of the screen.
We’re going to see how to make use of the hamburger menu in a NativeScript with Angular mobile application.
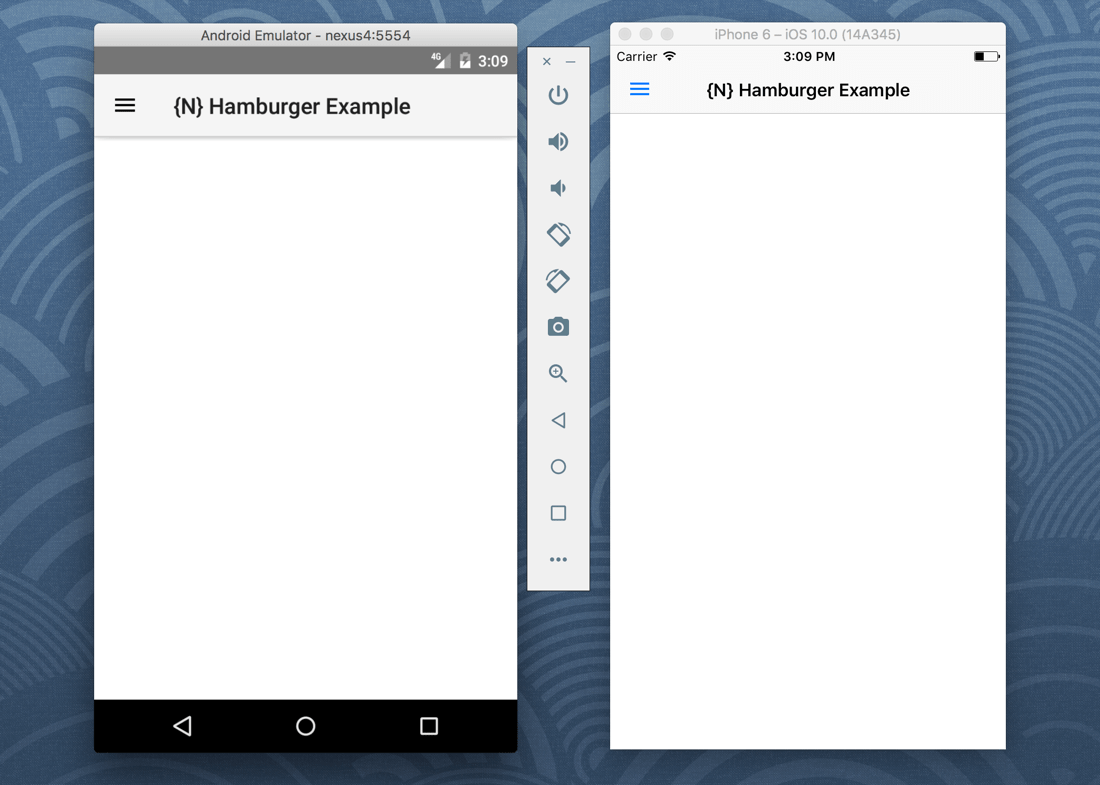
For simplicity, we’re not going to worry about creating a side drawer or any fancy menu effects. We’re going to focus strictly on getting a hamburger menu icon working for both Android and iOS. It will look something like the image below.

If you’re interested in using a side drawer in NativeScript, check out a previous tutorial I wrote on the topic.
Creating a New NativeScript with Angular Project
Let’s start by creating a fresh NativeScript project and working our way into our goals. Assuming you’ve already installed and configured the NativeScript CLI, execute the following:
tns create hamburger-project --ng
Take note of the --ng flag in the above command. This indicates that we’re creating an Angular project rather than a Core project.
With the project created, we’ll need to come up with a menu icon.
Downloading Attractive Icons Built for Mobile
We can easily create our own menu icon, but sometimes it is best to stay on top of trends and develop an application consistent to what people are familiar with.
There is an awesome website based on Material Design that has free to download icon sets. These icons can be found here.
Download the menu icon in the color of your choosing. Make sure that you download this icon as a PNG file and not another format. After downloading this icon package, you’ll find several directories including one for Android and iOS. Transfer the icons to the appropriate directories like so:
android/drawable-mdpi/ic_menu_black_24dp.png -> app/App_Resources/Android/drawable-mdpi/ic_menu_black_24dp.png
android/drawable-hdpi/ic_menu_black_24dp.png -> app/App_Resources/Android/drawable-hdpi/ic_menu_black_24dp.png
android/drawable-xhdpi/ic_menu_black_24dp.png -> app/App_Resources/Android/drawable-xhdpi/ic_menu_black_24dp.png
android/drawable-xxhdpi/ic_menu_black_24dp.png -> app/App_Resources/Android/drawable-xxhdpi/ic_menu_black_24dp.png
android/drawable-xxxhdpi/ic_menu_black_24dp.png -> app/App_Resources/Android/drawable-xxxhdpi/ic_menu_black_24dp.png
ios/ic_menu.imageset/ic_menu.png -> app/App_Resources/iOS/ic_menu.png
ios/ic_menu.imageset/ic_menu_2x.png -> app/App_Resources/iOS/ic_menu_2x.png
ios/ic_menu.imageset/ic_menu_3x.png -> app/App_Resources/iOS/ic_menu_3x.png
With the icons in the appropriate directories we can access them from within the application.
Handling the Differences Between Android and iOS
The NativeScript ActionBar behaves a little different between Android and iOS. This is because the native versions of this component behave differently.
Open the project’s app/app.component.html file and include the following:
<ActionBar title="{N} Hamburger Example">
    <NavigationButton icon="res://ic_menu_black_24dp"></NavigationButton>
    <ActionItem icon="res://ic_menu" ios.position="left"></ActionItem>
</ActionBar>
Notice in the above XML that we have both the NavigationButton and ActionItem components. On iOS, the only way to get an icon on the left is to use the NavigationButton. However, there is no concept of a NavigationButton on Android.
So what do we do to obtain matching behavior?
We need to do some custom work to determine what platform we’re using and render components depending on what was found. This can easily be handled via Angular Attribute Directives.
Create an app/if-platform.directive.ts file within your project and include the following:
import { Directive, ViewContainerRef, TemplateRef, Inject } from '@angular/core';
import { Device, platformNames } from "platform";
import { DEVICE } from "nativescript-angular/platform-providers";

@Directive({ selector: "[ifAndroid]" })
export class IfAndroidDirective {
    constructor( @Inject(DEVICE) device: Device, container: ViewContainerRef, templateRef: TemplateRef<Object>) {
        if (device.os === platformNames.android) {
            container.createEmbeddedView(templateRef);
        }
    }
}

@Directive({ selector: "[ifIos]" })
export class IfIosDirective {
    constructor( @Inject(DEVICE) device: Device, container: ViewContainerRef, templateRef: TemplateRef<Object>) {
        if (device.os === platformNames.ios) {
            container.createEmbeddedView(templateRef);
        }
    }
}
I cannot take credit for the above code. It was actually taken from a NativeScript issue ticket on GitHub.
Before we can use the custom attribute directive, we need to include it in the project. Open the project’s app/app.module.ts file and include the following code:
import { NgModule, NO_ERRORS_SCHEMA } from "@angular/core";
import { NativeScriptModule } from "nativescript-angular/nativescript.module";
import { AppRoutingModule } from "./app.routing";
import { AppComponent } from "./app.component";

import { IfAndroidDirective, IfIosDirective } from "./if-platform.directive";

import { ItemService } from "./item/item.service";
import { ItemsComponent } from "./item/items.component";
import { ItemDetailComponent } from "./item/item-detail.component";

@NgModule({
    bootstrap: [
        AppComponent
    ],
    imports: [
        NativeScriptModule,
        AppRoutingModule
    ],
    declarations: [
        AppComponent,
        ItemsComponent,
        ItemDetailComponent,
        IfAndroidDirective,
        IfIosDirective
    ],
    providers: [
        ItemService
    ],
    schemas: [
        NO_ERRORS_SCHEMA
    ]
})
export class AppModule { }
Notice in the above code that we’ve imported the file and added each directive to the declarations array of the @NgModule block.
Now if we navigate back into our app/app.component.html file, we can alter our ActionBar to look like the following:
<ActionBar title="{N} Hamburger Example">
    <NavigationButton icon="res://ic_menu_black_24dp" *ifAndroid></NavigationButton>
    <ActionItem icon="res://ic_menu" ios.position="left" *ifIos></ActionItem>
</ActionBar>
We’ve added *ifAndroid and *ifIos which will show or hide the component based on the platform used. The platform used is determined by the directives that we had created.
Conclusion
You just saw how to add a hamburger menu to your Android and iOS application built with NativeScript and Angular. In our example we had used freely available icons and a custom attribute directive for determining which platform is currently being used. By paying attention to the platform, either of the NavigationButton and ActionItem components can be used.

