Using A Mapbox In A NativeScript Angular Application
Including map functionality in your mobile application is often a very important necessity, depending on the scenario. Maybe your application needs to do navigation, or simply just show locations on a map.
There are many different map providers, the most popular being Google Maps. However, Mapbox is picking up steam because of how easy it is to use and its pricing model.
We’re going to see how to include Mapbox in our NativeScript Android and iOS mobile application using Angular and TypeScript.
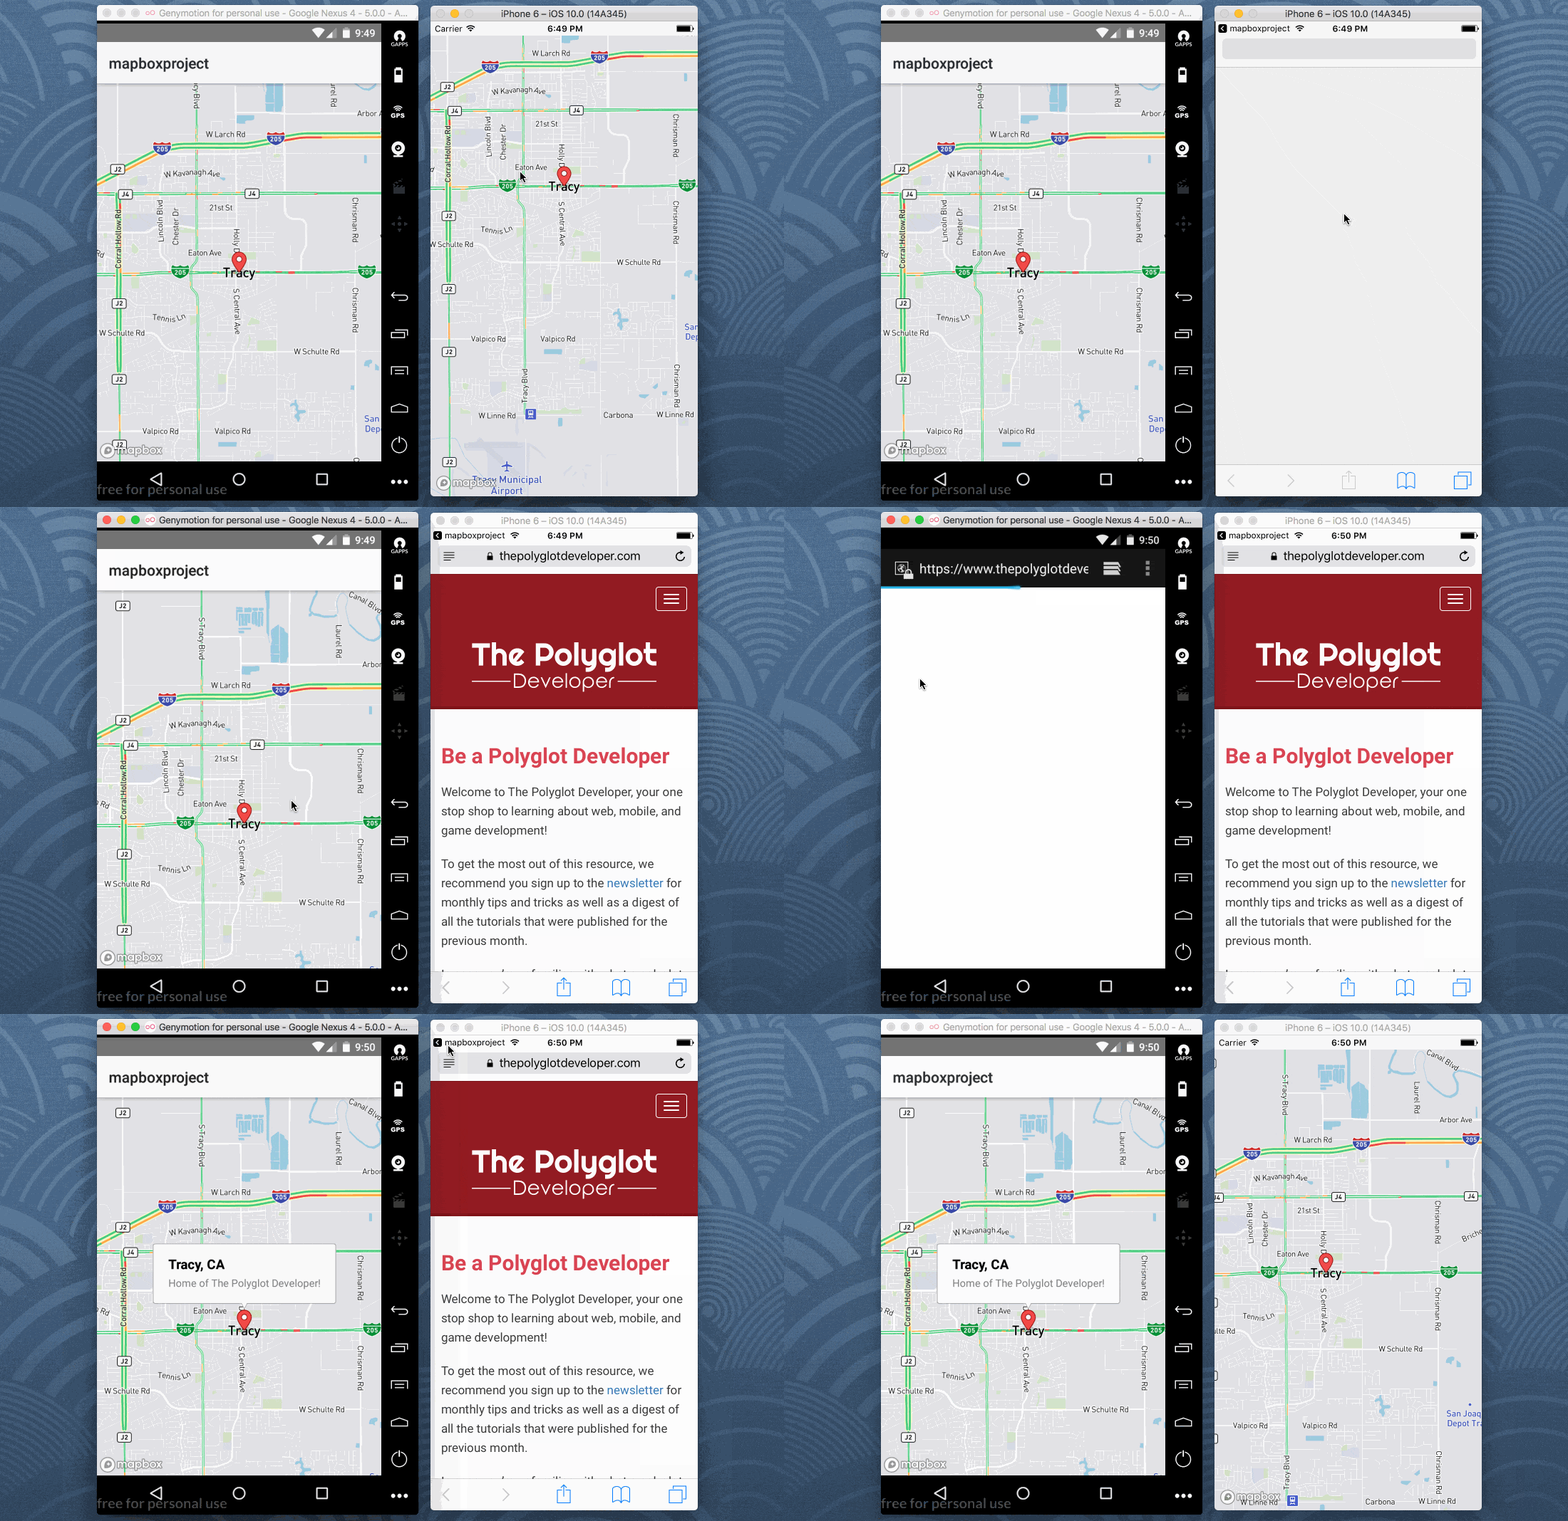
There are a lot of things we can do with NativeScript and Mapbox. We’re going to focus on getting a map on the screen, positioning it, and displaying an interactive marker.

Once Mapbox is properly configured, performing more complicated tasks is quite easy.
Creating a New NativeScript Project
For simplicity, we’re going to create a fresh NativeScript with Angular project somewhere on our local machine. From the Terminal (Mac and Linux) or Command Prompt (Windows), execute the following:
tns create mapbox-project --ng
The above command will create a new project. The --ng flag indicates that we are going to be using the Angular template, not something else like Vue.js.
With the project created, we’ll need to include the Mapbox plugin for NativeScript. This can be installed by executing the following:
tns plugin add nativescript-mapbox
More information on installing the Mapbox plugin, or using it beyond this guide, can be found in the official documentation.
Registering for a Mapbox Account and Configuring the Project
Before Mapbox can be used within the project, an account must be registered. There is a free tier to Mapbox, so don’t worry about having to shell out a bunch of cash to include it in your project.
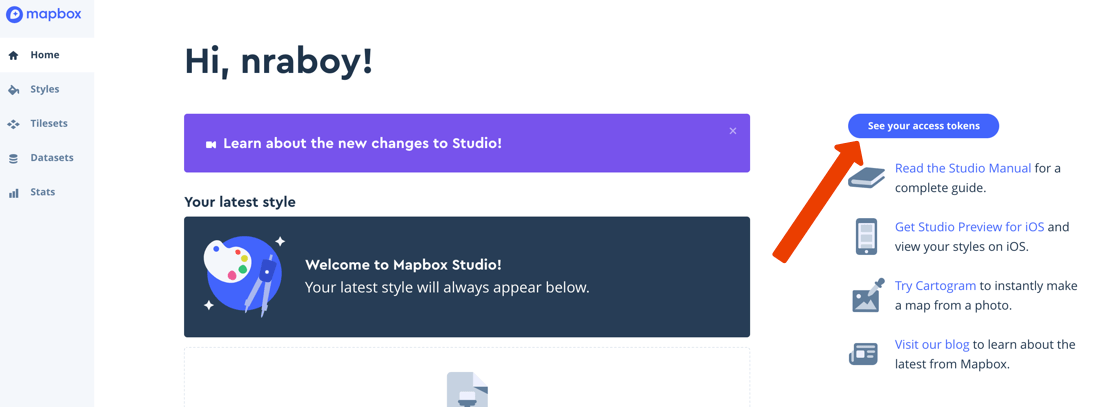
Create an account here and choose to see your tokens.

When viewing your tokens, take note of your public tokens. You’ll want to use a public token within the NativeScript project. Without a functional public token, the map will not work.
Now we need to configure the project so the Mapbox plugin will work with Angular. Open the project’s app/app.module.ts file and make it look like the following:
import { NgModule, NO_ERRORS_SCHEMA } from "@angular/core";
import { NativeScriptModule } from "nativescript-angular/nativescript.module";
import { AppRoutingModule } from "./app.routing";
import { AppComponent } from "./app.component";

import { ItemService } from "./item/item.service";
import { ItemsComponent } from "./item/items.component";
import { ItemDetailComponent } from "./item/item-detail.component";

import { registerElement } from "nativescript-angular/element-registry";
registerElement("Mapbox", () => require("nativescript-mapbox").MapboxView);

@NgModule({
    bootstrap: [
        AppComponent
    ],
    imports: [
        NativeScriptModule,
        AppRoutingModule
    ],
    declarations: [
        AppComponent,
        ItemsComponent,
        ItemDetailComponent
    ],
    providers: [
        ItemService
    ],
    schemas: [
        NO_ERRORS_SCHEMA
    ]
})
export class AppModule { }
We’ve only added two lines to the project’s app/app.module.ts file. As per the plugin documentation, we needed to add the following lines:
import { registerElement } from "nativescript-angular/element-registry";
registerElement("Mapbox", () => require("nativescript-mapbox").MapboxView);
At this point in time we can make full use of the plugin within our project. Let’s take a look at including a few map related features.
Including Logic for Markers and Mapbox Geolocation Attributes
We’re going to keep our project as a single page mobile application. Adding multiple pages will add complexity that isn’t truly relevant for this example. If you’d like to learn about working with routes, check out my previous article titled, Navigating a NativeScript App with the Angular Router.
Open the project’s app/app.component.html file and include the following XML markup:
<ContentView height="100%" width="100%">
    <Mapbox
        #map
        accessToken="MAPBOX-PUBLIC-KEY-HERE"
        mapStyle="traffic_day"
        latitude="37.7397"
        longitude="-121.4252"
        hideCompass="true"
        zoomLevel="12"
        showUserLocation="false"
        disableZoom="false"
        disableRotation="false"
        disableScroll="false"
        disableTilt="false"
        (mapReady)="onMapReady($event)">
    </Mapbox>
</ContentView>
The above code is nearly identical to what exists in the plugin documentation. Each of the properties are related to how the map is positioned and how you can interact with it. The #map and mapReady attributes are very important to us.
The #map attribute will allow us to interact with the map from the TypeScript and the mapReady attribute will tell us when the map is ready to be used. We cannot interact with the map until the mapReady event triggers.
Open the project’s app/app.component.ts file and include the following TypeScript code:
import { Component, ViewChild, ElementRef } from "@angular/core";
import * as utils from "utils/utils";

@Component({
    selector: "ns-app",
    templateUrl: "app.component.html",
})
export class AppComponent {

    @ViewChild("map") public mapbox: ElementRef;

    public onMapReady(args: any) {
        this.mapbox.nativeElement.addMarkers([
            {
                lat: 37.7397,
                lng: -121.4252,
                title: "Tracy, CA",
                subtitle: "Home of The Polyglot Developer!",
                onCalloutTap: () => {
                    utils.openUrl("https://www.thepolyglotdeveloper.com");
                }
            }
        ]);
    }

}
Remember that #map attribute from the XML markup? We’re mapping it to a mapbox variable within the TypeScript code. When the map is ready, we add a marker to it.
The marker will have a tap event that will open a web browser and display a website when clicked. More information on using the NativeScript web browser can be seen in a previous article that I wrote.
Conclusion
Using Mapbox in a NativeScript with Angular project isn’t difficult. The most complicated part in using Mapbox is the initial configuration as it isn’t completely obvious.
There are more things that can be done with maps than just showing a location with markers. For example points on the map can be connected via lines or things can be done with offline maps. Check out the plugin documentation for more information on the subject.

