Getting Started With Capacitor Using React
 June 1, 2018
 Roman Akhromieiev
 Mobile Development


In February 2018 the Ionic team announced Capacitor. Capacitor allows you to make your frontend builds run everywhere, for example, iOS, Android, Electron and in the browser as a progressive web application (PWA).
Also, Capacitor provides a high-quality API to work with native functions within your apps. For example, you can get access to the camera and it means you still get this access to every platform.
In the official Capacitor documentation you can find a well-described tutorial on how to use Capacitor with Ionic, but in our tutorial, we will check how you can add Capacitor to your existing React app. We will create a simple React app with Capacitor and run it on iOS and in the browser as PWA.
If you’re interested in integrating Capacitor into your Vue.js app you can go with this tutorial that I had previously written.
Getting Started
To follow this tutorial you should have the basic fundamentals of the command line, React, JavaScript, ES6 syntax, installed Node, Capacitor and have macOS with Xcode (if you want to run this app on iOS).
All the following was done with the next requirements: Node v9.10.0, Capacitor 1.0.0-alpha.x, NPM/NPX v.6.0.1, YARN v.0.24.5.
Important: In this tutorial, we used Capacitor version Alpha, so it’s not production ready.
Scaffolding a React.js Project using the CLI
Let’s setup a new React project using the official create-react-app CLI tools. We will use the pretty simple scaffold project with minimum configurations. We’ll run the following command in the terminal:
npm install -g create-react-app
Then we can create a simple project using the installed CLI tools. Let’s name our project as react-capacitor-example. In the Terminal, execute:
create-react-app react-capacitor-example
If all was good, you will see a message about the successfully installed project.
Next we need to open your newly created project and try to run it in the development mode:
cd react-capacitor-example
npm install
npm run start
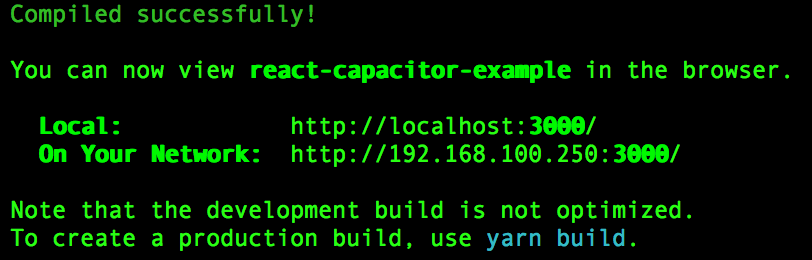
Now you should see the following in your Terminal:
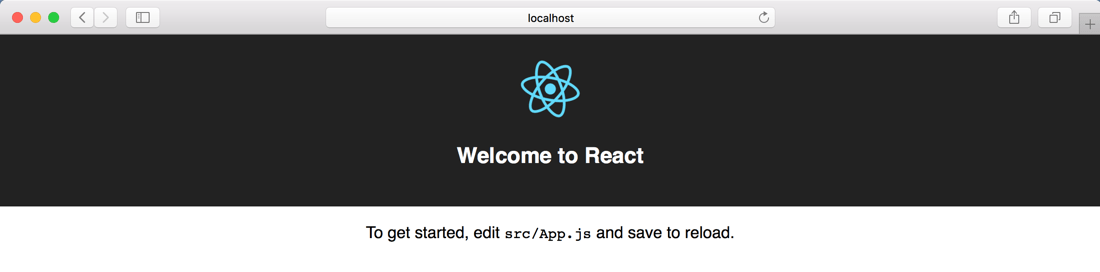
After this, you can check the project in your browser. You can open the browser on port 3000 and should see the default React project:
If everything’s the same as above - we can move on to setting up Capacitor.
Setting Up Capacitor
We can add Capacitor using NPM with the following command inside the project folder:
npm install --save @capacitor/cli @capacitor/core
After this, we need to initialize Capacitor with information about the application. The app name will be react-capacitor-example, the app package ID – com.example.reactCapacitor.
npx cap init react-capacitor-example com.example.reactCapacitor
You will see the message:
Your Capacitor project is ready to go!".
Now we can add the platforms to our existing React app, but before this, we need to change the default build folder in the Capacitor configuration.
We can easily fix this by changing the webDir property in capacitor.config.json. Just replace www to build. The capacitor.config.json should look like this:
{
    "appId": "com.example.reactCapacitor",
    "appName": "react-capacitor-example",
    "bundledWebRuntime": false,
    "webDir": "build"
}
Let’s make sure of our changes by building the project using the following:
npm run build
Now we can add the iOS platform using the next command:
npx cap add ios
That is all for adding Capacitor to our project. In the next section, we will add simple native functionality using the Capacitor API.
Using the Capacitor API
There are a number of Native APIs available in all Capacitor apps (you can check all of them in the official Capacitor Documentation), but in our app, we will focus only on the integration of the Modal and Device APIs. This example will be enough to understand how to work with the rest of Capacitor APIs.
A Modal is a dialog box. It’s used in the most modern apps. In our app, we will show the name and unique ID of the device in the Modal by pressing the button.
First of all, we need to include the described APIs in the App.js component:
import { Plugins } from '@capacitor/core';
const { Device, Modals } = Plugins;
Now we can create a showDeviceInfo method in src/App.js file. Inside this function we will get the Device data and then show this data in the Alert Modal. Our method will look like this:
async showDeviceInfo() {
    let info = await Device.getInfo();
    await Modals.alert({
        title: 'Info',
        message: `UUID: ${info.uuid};
        Model: ${info.model}`
    });
}
Don’t forget to bind this method inside the constructor:
constructor(props) {
    super(props);
    this.showDeviceInfo = this.showDeviceInfo.bind(this);
}
Next, we will add a Button with the name “Show Device Info” to the default App.js template. The click event on this button will call the showDeviceInfo async function.
The src/App.js file should look like this:
import React, { Component } from 'react';
import logo from './logo.svg';
import './App.css';
import { Plugins } from '@capacitor/core';

const { Device, Modals } = Plugins;

class App extends Component {

    constructor(props) {
        super(props);
        this.showDeviceInfo = this.showDeviceInfo.bind(this);
    }

    async showDeviceInfo() {
        let info = await Device.getInfo();
        await Modals.alert({
            title: 'Info',
            message: `UUID: ${info.uuid};
            Model: ${info.model}`
        });
    }

    render() {
        return (
            <div className="App">
                <header className="App-header">
                    <img src={logo} className="App-logo" alt="logo" />
                    <h1 className="App-title">Welcome to React</h1>
                </header>
                <button onClick={this.showDeviceInfo}> Show Device Info</button>
                <p className="App-intro">
                    To get started, edit <code>src/App.js</code> and save to reload.
                </p>
            </div>
        );
    }

}

export default App;
Build the Project to Various Platforms
In this tutorial, we will focus only on iOS and PWA deployments.
First of all, we need to create a production build of the project and then copy all web assets to the native projects (iOS in our case). Reflect the following commands in project folder:
npm run build
npx cap copy
Now, we can open your iOS build in Xcode using the next command:
npx cap open ios
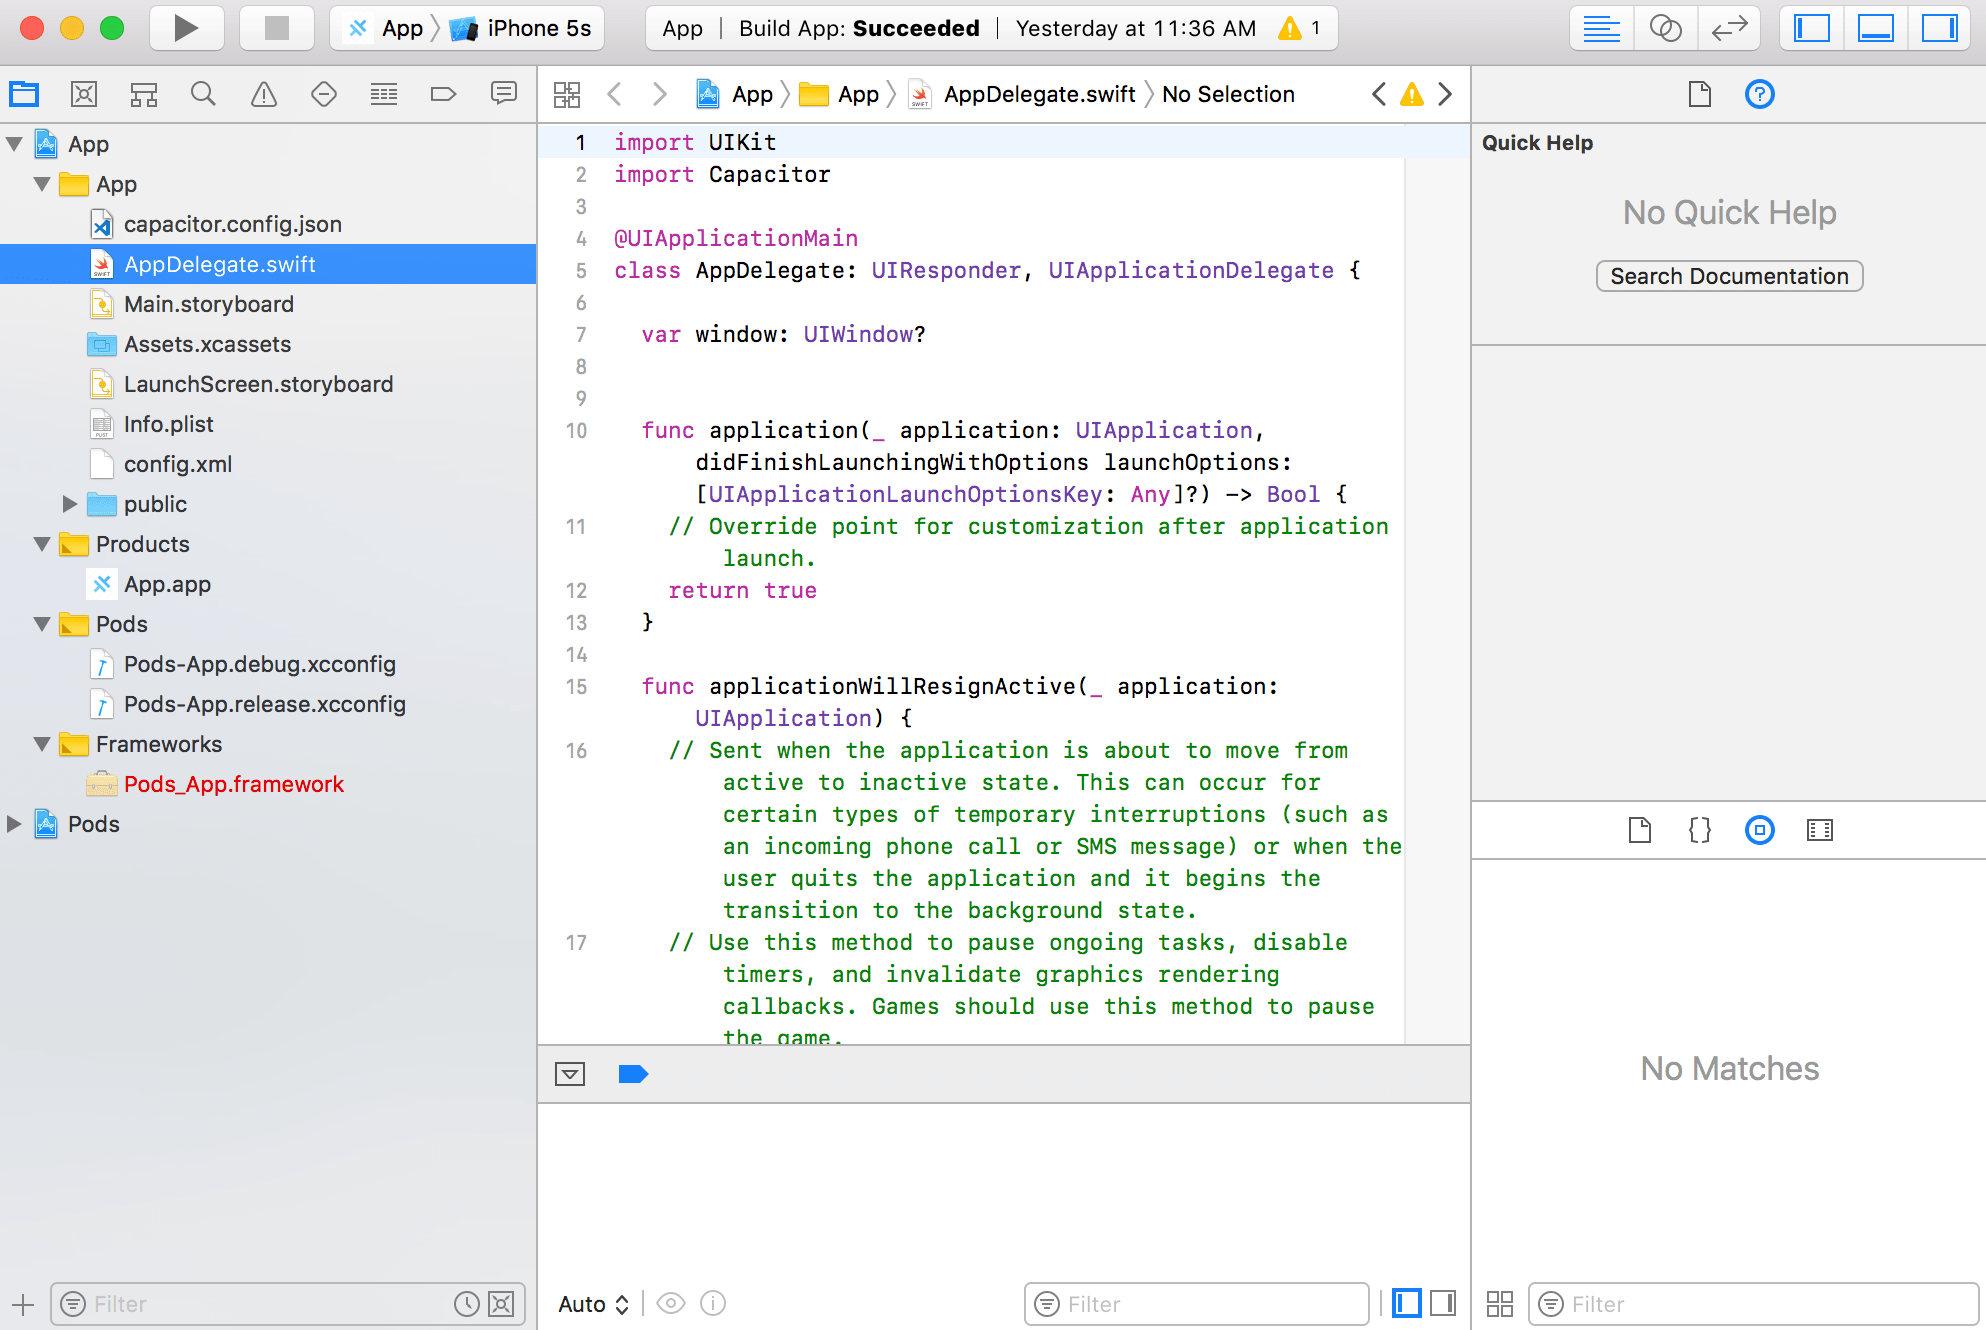
The Xcode IDE will open with the iOS build of our React project:
Next we are going to run app in the emulator by pressing the “Play” button:
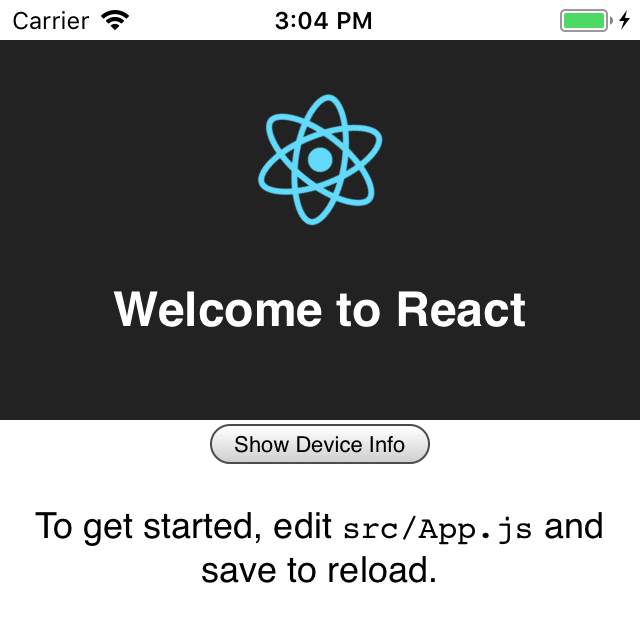
When you click on Show Device Info button, you will see the Modal with the long UUID (it does not fit the window) and device name:
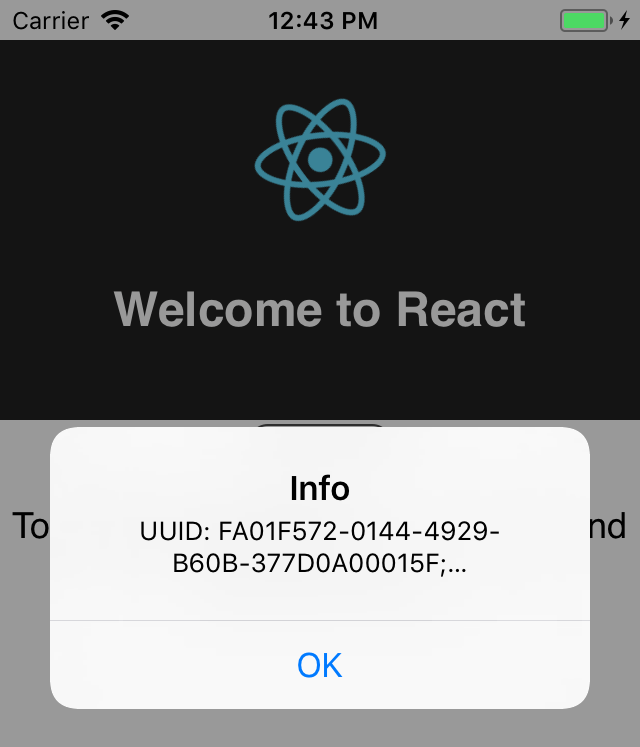
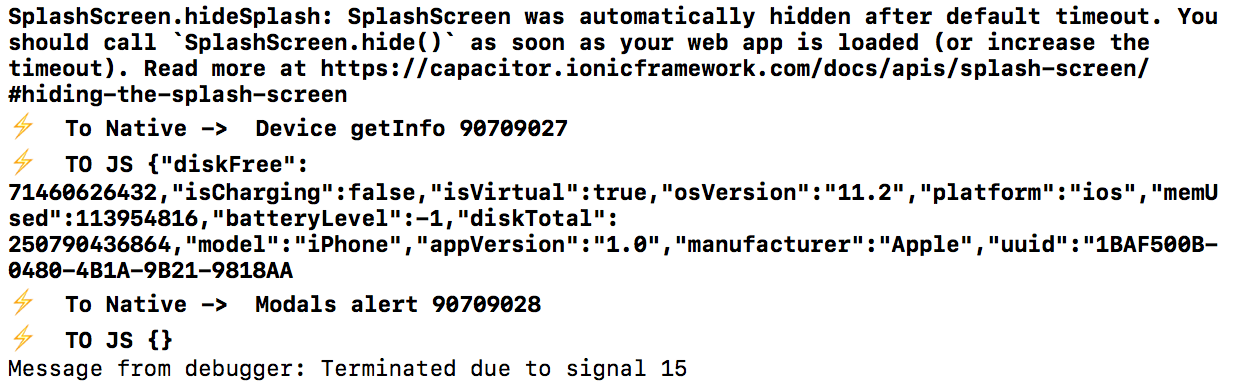
But you can be sure that all is alright when checking this data in the Xcode console:
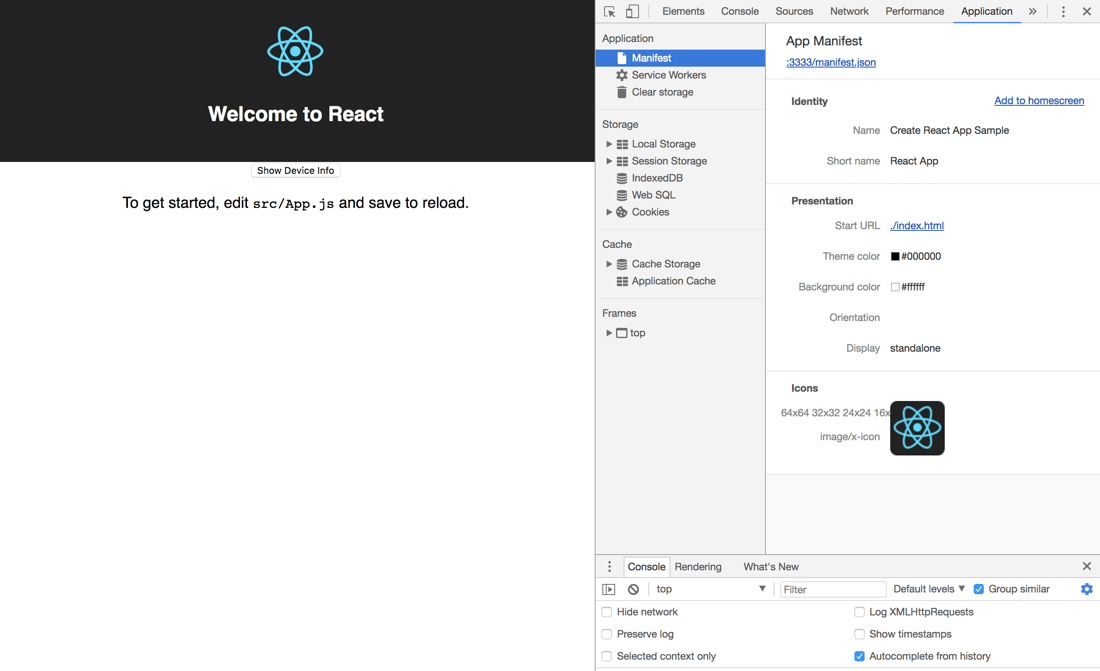
It’s all about iOS for this project as of now. What about PWAs? We can run the PWA build using a simple command in project folder:
npx cap serve
If you check the browser on port 3333, you will see the application:
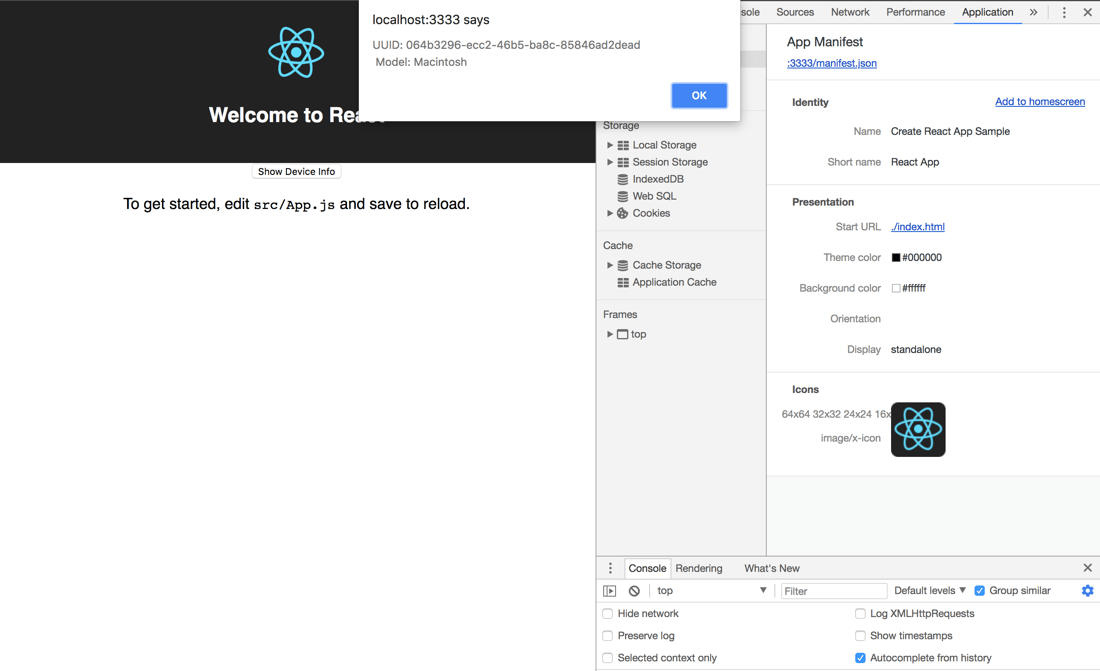
After clicking the button, you will the default alert window in the browser:
Conclusion
In this tutorial we learned how to:
- Create a React project using the create-react-app CLI
- Integrate Capacitor into the React project
- Use the Capacitor Modal and Device APIs in React project
- Create an iOS build using Capacitor
- Run a PWA build using Capacitor serve
All code related to this tutorial you can find here.

Roman Akhromieiev
Passionate full stack developer from Ukraine. Writing about full stack development on https://akhromieiev.com
Follow Us

Support This Site
If you found this developer resource helpful, please consider supporting it through the following options:


