Build a Totally Serverless REST API with MongoDB Atlas
So you want to build a REST API, but you don’t want to worry about the management burden when it comes to scaling it to meet the demand of your users. Or maybe you know your API will experience more burst usage than constant demand and you’d like to reduce your infrastructure costs.
These are two great scenarios where a serverless architecture could benefit your API development. However, did you know that the serverless architecture doesn’t stop at just the API level? You could make use of a serverless database in addition to the application layer and reap the benefits of going totally serverless.
In this tutorial, we’ll see how to go totally serverless in our application and data development using a MongoDB Atlas serverless instance as well as Atlas HTTPS endpoints for our application.
Prerequisites
You won’t need much to be successful with this tutorial:
- A MongoDB Atlas account.
- A basic understanding of Node.js and JavaScript.
We’ll see how to get started with MongoDB Atlas in this tutorial, but you’ll need a basic understanding of JavaScript because we’ll be using it to create our serverless API endpoints.
Deploy and configure a MongoDB Atlas serverless instance
We’re going to start this serverless journey with a serverless database deployment. Serverless instances provide an on-demand database endpoint for your application that will automatically scale up and down to zero with application demand and only charge you based on your usage. Due to the limited strain we put on our database in this tutorial, you’ll have to use your imagination when it comes to scaling.
It’s worth noting that the serverless API that we create with the Atlas HTTPS endpoints can use a pre-provisioned database instance and is not limited to just serverless database instances. We’re using a serverless instance to maintain 100% serverless scalability from database to application.
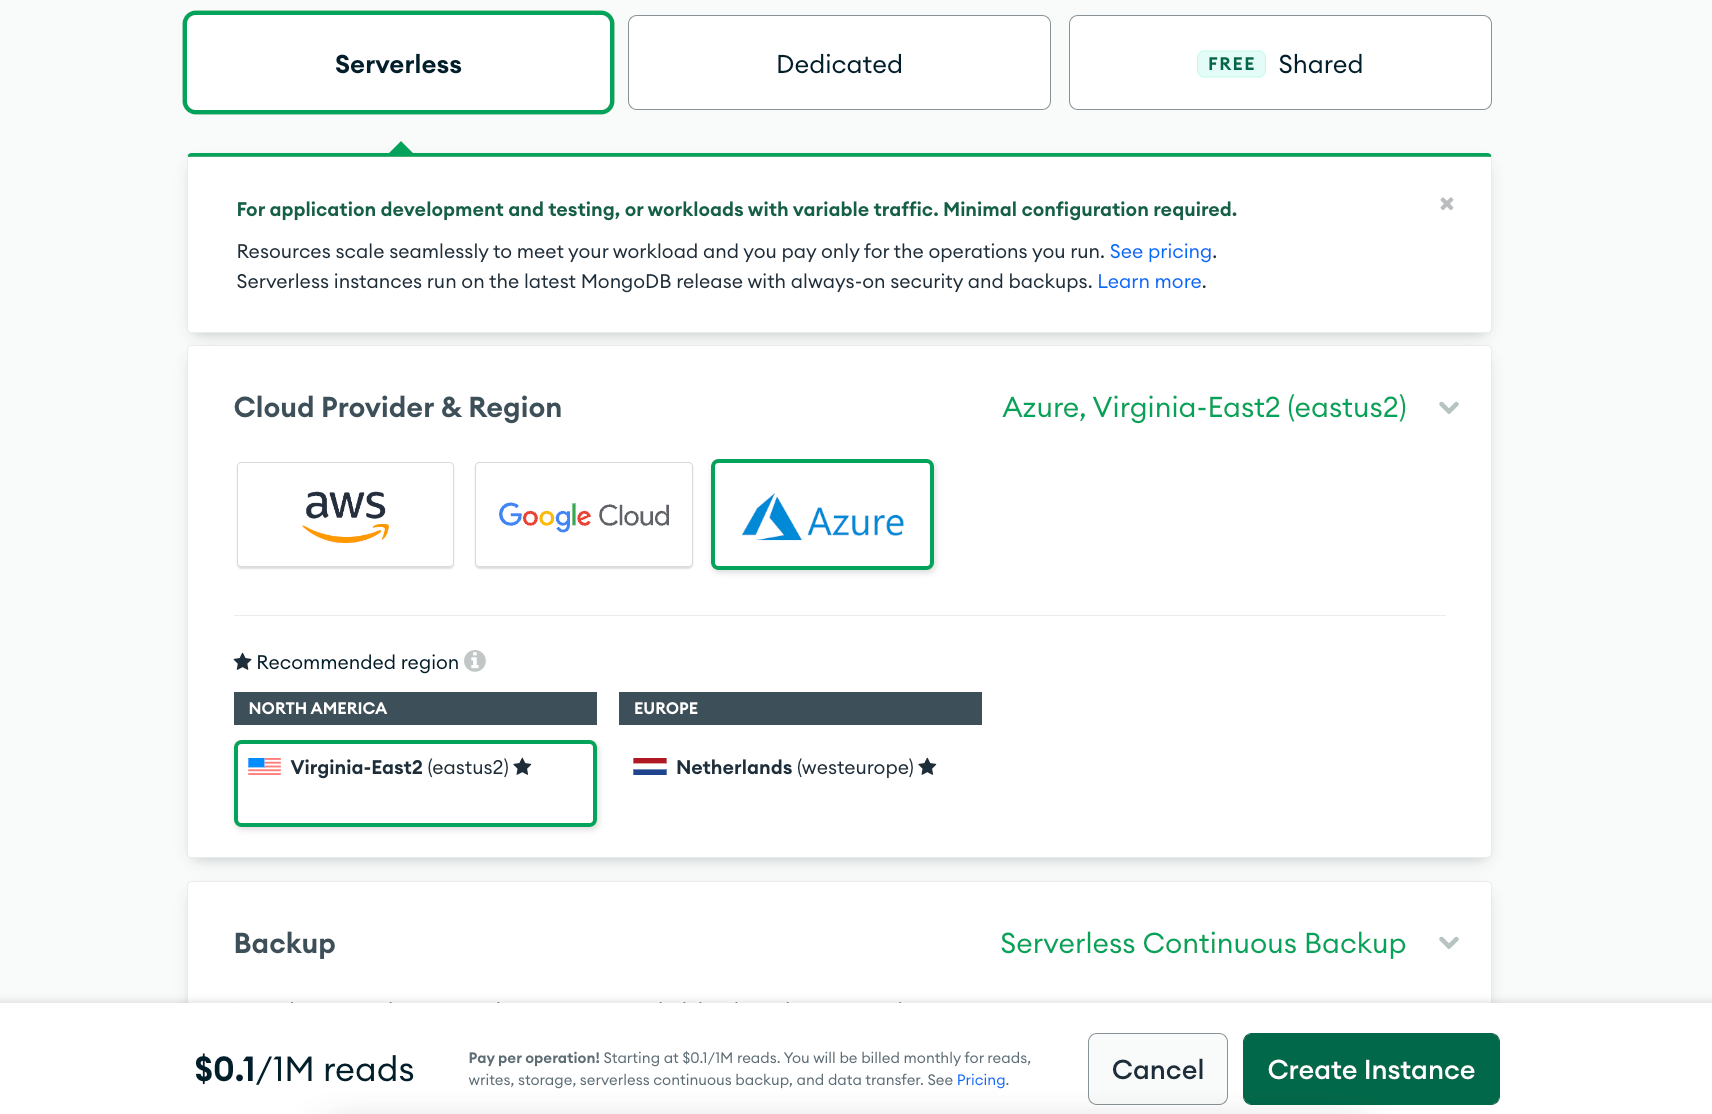
From the MongoDB Atlas Dashboard, click the “Create” button.

You’ll want to choose “Serverless” as the instance type followed by the cloud in which you’d like it to live. For this example, the cloud vendor isn’t important, but if you have other applications that exist on one of the listed clouds, for latency reasons it would make sense to keep things consistent. You’ll notice that the configuration process is very minimal and you never need to think about provisioning any specified resources for your database.
When you click the “Create Instance” button, your instance is ready to go!
Developing a REST API with MongoDB Atlas HTTPS endpoints
To create the endpoints for our API, we are going to leverage Atlas HTTPS endpoints.Think of these as a combination of Functions as a Service (FaaS) and an API gateway that routes URLs to a function. This service can be found in the “App Services” tab area within MongoDB Atlas.
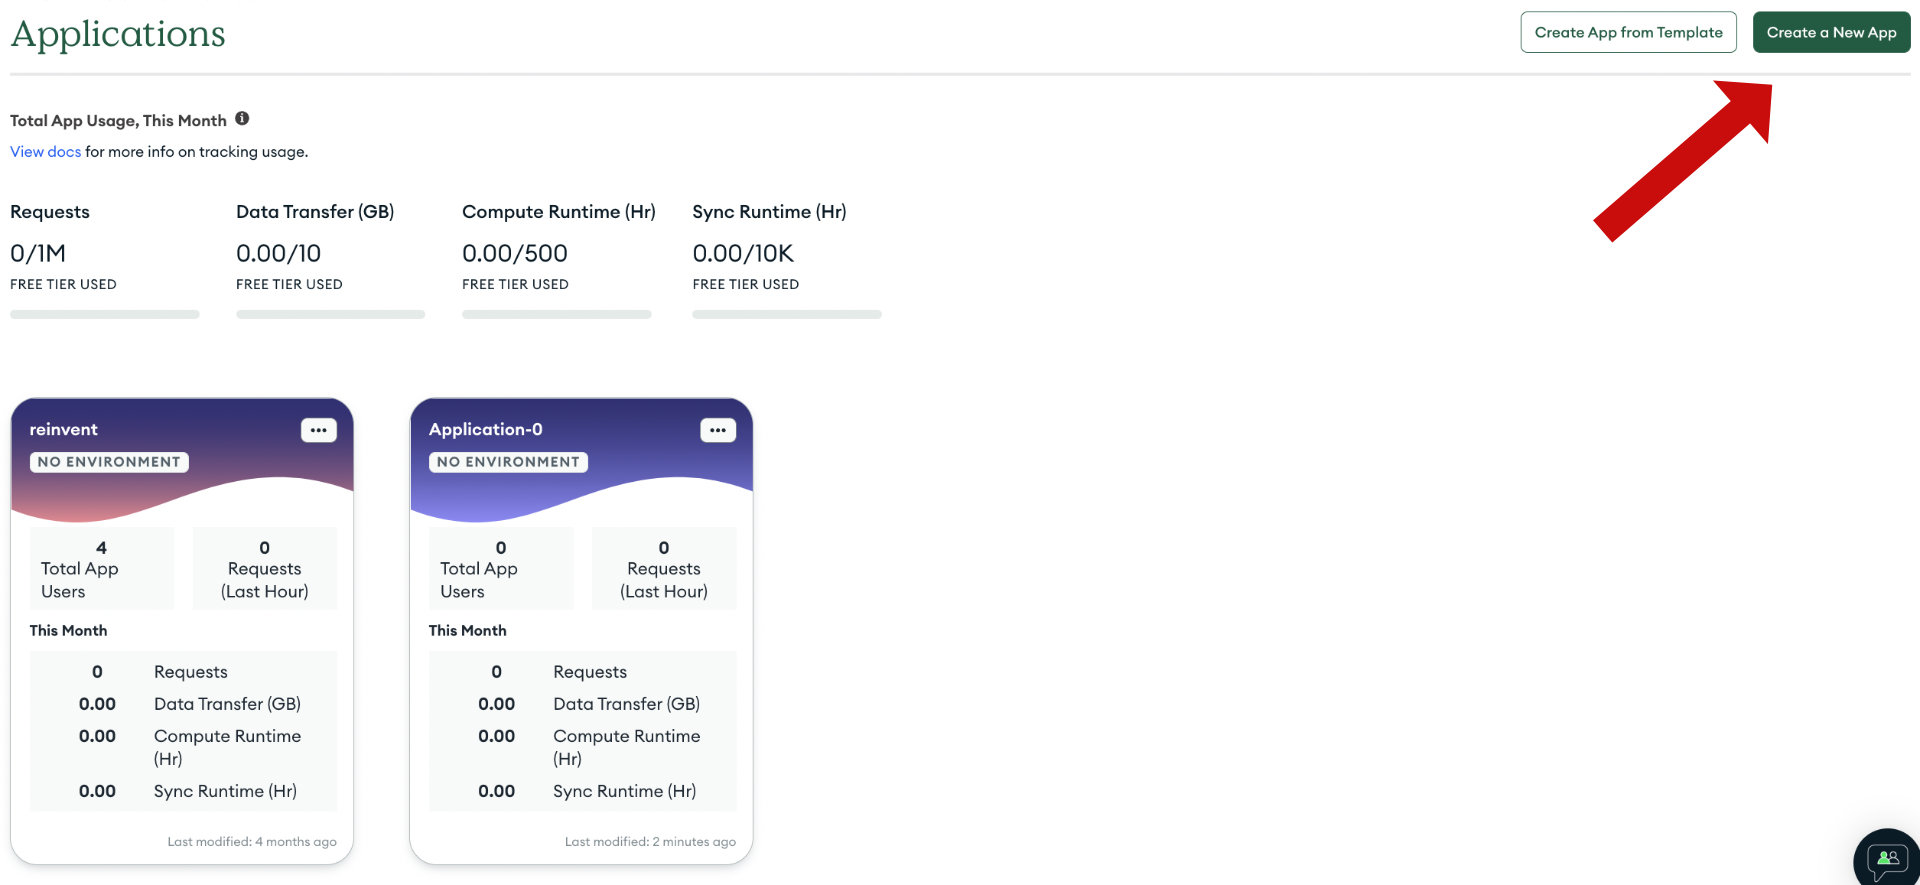
Click on the “App Services” tab within MongoDB Atlas.

You’ll need to create an application for this particular project. Choose the “Create a New App” button and select the serverless instance as the cluster that you wish to use.
There’s a lot you can do with Atlas App Services beyond API creation in case you wanted to explore items out of the scope of this tutorial.
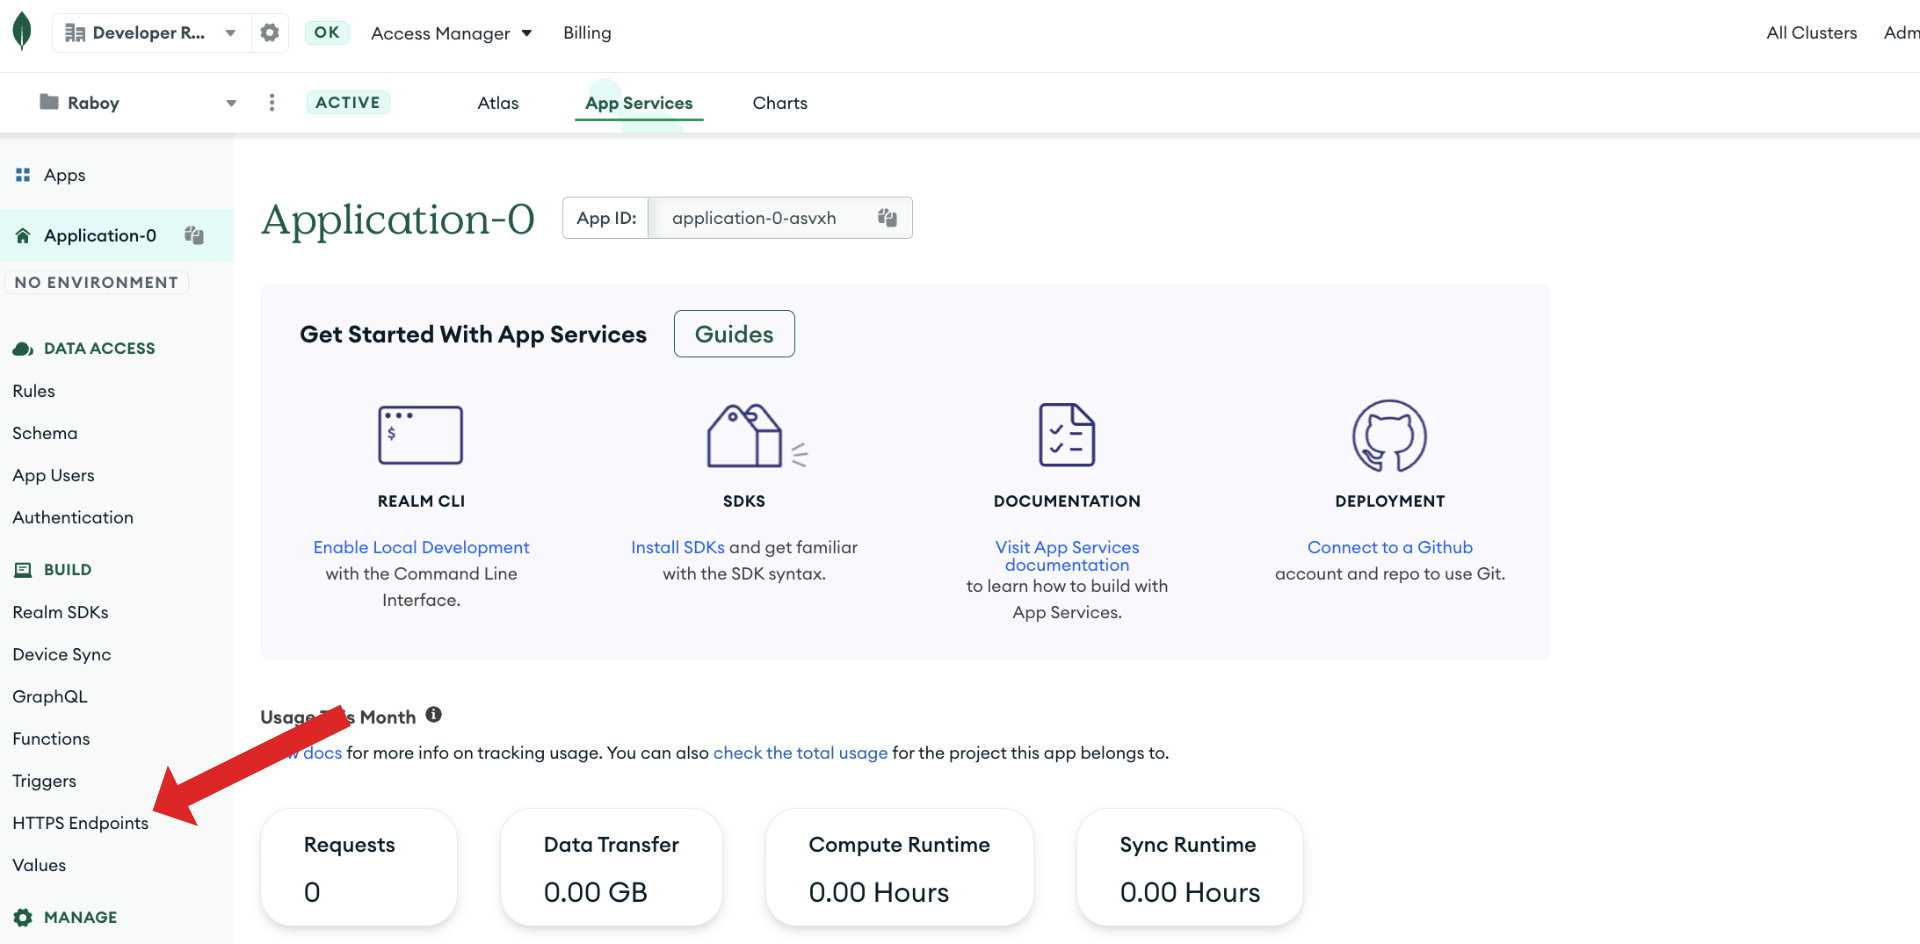
From the App Services dashboard, choose “HTTPS Endpoints.”

We’re going to create our first endpoint and it will be responsible for creating a new document.
When creating the new endpoint, use the following information:
- Route: /person
- Enabled: true
- HTTP Method: POST
- Respond with Result: true
- Return Type: JSON
- Function: New Function
The remaining fields can be left as their default values.
Give the new function a name. The name is not important, but it would make sense to call it something like “createPerson” for your own sanity.
The JavaScript for the function should look like the following:
exports = function({ query, headers, body}, response) {
    const result = context.services
    	.get("mongodb-atlas")
    	.db("examples")
    	.collection("people")
    	.insertOne(JSON.parse(body.text()));

    return result;
};
Remember, our goal is to create a document.
In the above function, we are using the “examples” database and the “people” collection within our serverless instance. Neither need to exist prior to creating the function or executing our code. They will be created at runtime.
For this example, we are not doing any data validation. Whatever the client sends through a request body will be saved into MongoDB. Your actual function logic will likely vary to accommodate more of your business logic.
We’re not in the clear yet. We need to change our authentication rules for the function. Click on the “Functions” navigation item and then choose the “Settings” tab. More complex authentication mechanisms are out of the scope of this particular tutorial, so we’re going to give the function “System” level authentication. Consult the documentation to see what authentication mechanisms make the most sense for you.
We’re going to create one more endpoint for this tutorial. We want to be able to retrieve any document from within our collection.
Create a new HTTPS endpoint. Use the following information:
- Route: /people
- Enabled: true
- HTTP Method: GET
- Respond with Result: true
- Return Type: JSON
- Function: New Function
Once again, the other fields can be left as the default. Choose a name like “retrievePeople” for your function, or whatever makes the most sense to you.
The function itself can be as simple as the following:
exports = function({ query, headers, body}, response) {

    const docs = context.services
      .get("mongodb-atlas")
      .db("examples")
      .collection("people")
      .find({})
      .toArray();

    return docs;
};
In the above example, we’re using an empty filter to find and return all documents in our collection.
To make this work, don’t forget to change the authentication on the “retrievePeople” function like you did the “createPerson” function. The “System” level works for this example, but once again, pick what makes the most sense for your production scenario.
MongoDB Atlas App Services authentication, authorization, and general security
We brushed over it throughout the tutorial, but it’s worth further clarifying the levels of security available to you when developing a serverless REST API with MongoDB Atlas.
We can use all or some of the following to improve the security of our API:
- Authentication
- Authorization
- Network security with IP access lists
With a network rule, you can allow everyone on the internet to be able to reach your API or specific IP addresses. This can be useful if you are building a public API or something internal for your organization.
The network rules for your application should be your first line of defense.
Throughout this tutorial, we used “System” level authentication for our endpoints. This essentially allows anyone who can reach our API from a network level access to our API without question. If you want to improve the security beyond a network rule, you can change the authentication mechanism to something like “Application” or “User” instead.
MongoDB offers a variety of ways to authenticate users. For example, you could enable email and password authentication, OAuth, or something custom. This would require the user to authenticate and establish a token or session prior to interacting with your API.
Finally, you can take advantage of authorization rules within Atlas App Services. This can be valuable if you want to restrict users in what they can do with your API. These rules are created using special JSON expressions.
If you’re interested in learning the implementation specifics behind network level security, authentication, or authorization, take a look at the documentation.
Conclusion
You just saw how to get started developing a truly serverless application with MongoDB Atlas. Not only was the API serverless through use of Atlas HTTPS endpoints, but it also made use of a serverless database instance.
When using this approach, your application will scale to meet demand without any developer intervention. You’ll also be billed for usage rather than uptime, which could provide many advantages.
If you want to learn more, consider checking out the MongoDB Community Forums to see how other developers are integrating serverless.
This content first appeared on MongoDB.

