Grab a Pint With Django-MongoDB-Backend, Voyage AI, and LangChain
 April 19, 2025
 Anaiya Raisinghani
 Web Development


DjangoCon Europe is just around the corner, and this year, it’s in Dublin, Ireland. This means two things:
- I’m legally required to drink my first Guinness (yes, first ever!).
- I obviously had to build an app to help me find the best pubs to accomplish my Guinness goal.
This full-stack, AI-powered Dublin City Center Pub Finder app is built using our new Django MongoDB Backend Python package, Voyage AI embeddings to best understand the queries, and LangChain to power our natural-language interface.
So, if you’re in Dublin and you really want a “Guinness, outside, with live music,” this Pub Finder will help you find the three best options!
Before we go into how it works and how you can build it yourself, let’s go over the platforms used.
What is our Django MongoDB Backend?
Our official Django MongoDB Backend was released for Public Preview back in February. This incredible Python package offers developers a ton of fantastic features, such as the ability to use Django models with confidence, Django admin support, native connecting from the settings.py file, MongoDB-specific querying optimizations, and more!
This combination of MongoDB’s document model, ecosystem of tools, and various advanced features allows for Django developers to build a multitude of complicated applications, simply.
LangChain MongoDB
LangChain is an open source framework used to build applications that are powered by large language models (LLMs). There are a variety of use cases for LangChain, such as document analysis, chat bots, retrieval-augmented generation (RAG), etc. It works by chaining together various components (links) to create a comprehensive workflow where each link performs various tasks in the process, such as accessing your data, calling the language model used, processing data, etc. Because these links are malleable, LangChain is known for its flexibility.
With our MongoDB LangChain Python integration, developers are able to integrate MongoDB Atlas Vector Search with LangChain to build generative AI and RAG applications!
What is Voyage AI and why are we using them?
Voyage AI provides world-class embedding models and rerankers for any AI application. They specialize in creating these state-of-the-art embedding models which help transform complex data (text, images, videos) into vectors that have extremely high accuracy, are competitive in the space, and allow for fast inference and multi-language support. Voyage AI was recently acquired by MongoDB with the goal of more accurate and context-aware AI queries inside applications.
Pre-requisites
This tutorial requires a number of pre-requisites in order to be successful:
- An IDE of your choosing (this tutorial uses VSCode).
- A MongoDB Atlas account.
- A MongoDB Atlas cluster—the free tier will work perfectly. Please make sure your IP address is correctly configured.
- A MongoDB Connection String (with the username, password, and database included in the string).
- The dataset we are using for this tutorial. It has information on 40 pubs and wine bars in Dublin’s City Center with the address, the name, and five concatenated Google reviews. Please download this JSON file and add it to the root of your project directory.
- A Voyage AI API key.
Background on data collecting
This section is for those who are interested in how I gathered the data used; it’s not necessary to recreate for this tutorial as long as you have access to the dataset in Kaggle.
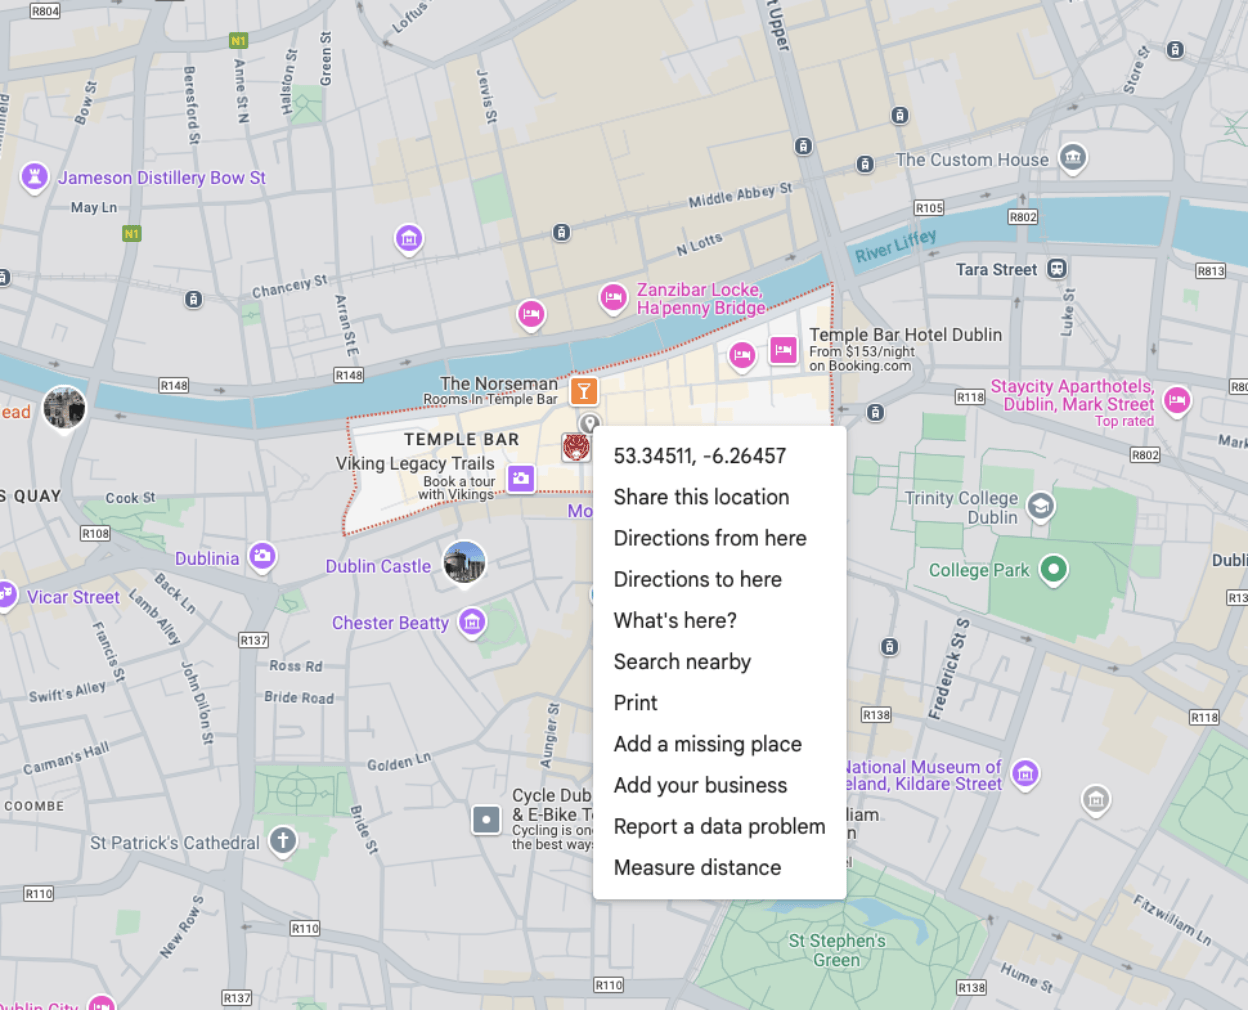
While looking around on Google Maps, I saw that Temple Bar was one of the more popular locations in Dublin! The Google Maps Places API (New) allows for a maximum of 20 locations per API call. So, I did two API calls in this location, one for the tag “pub” and the other for the tag “wine_bar”. This way, I had 40 data points for my file and so we could have more options for places to grab a drink in Dublin.
From there, I saved all the places located from the Google Places API calls into a JSON document that I was able to upload into my project folder.
Now that we better understand the dataset, let’s get started on building out the tutorial.
Step 1: Create Django project using Django-MongoDB-Backend library
Our first step is to download the django-mongodb-backend package. Please use the Django-MongoDB-Backend Quickstart to help you get up and running with setting up your Django and MongoDB integration.
First, we need to create a virtual environment.
Create a virtual environment
In your terminal, run:
python3.12 -m venv venv
Then:
source venv/bin/activate
Make sure you are running the correct Python version:
python --version
Once the virtual environment is up and running, let’s get started on our requirements.txt file.
Create a new file in your project, name it requirements.txt, and include the following:
python-dotenv==1.0.1
voyageai==0.3.2
langchain-voyageai==0.1.4
langchain-mongodb==0.5.0
You can also include:
django-mongodb-backend==5.1.0b1
And install it all in one go, but in a couple steps, I will show that you can use a pip command to install the django-mongodb-backend for reader clarity.
Install the requirements using:
pip install -r requirements.txt
Great, now we can go ahead and install the Django MongoDB Backend library.
Install the Django MongoDB Backend library
Run the following command:
pip install django-mongodb-backend
Once that’s run, we can create our Django project.
This template is the same as the default Django project template, but with a handful of crucial changes. It ensures MongoDB-specific migrations, and our settings.py file is modified so that Django uses an ObjectID value for each of our model’s primary keys. It also ensures we have MongoDB-specific app configurations for Django apps that have a default_auto_field set. This means we can create our own apps and set django_mongodb_backend.fields.ObjectIdAutoField.
So let’s create a new Django project. We can name it finder:
django-admin startproject finder --template https://github.com/mongodb-labs/django-mongodb-project/archive/refs/heads/5.0.x.zip
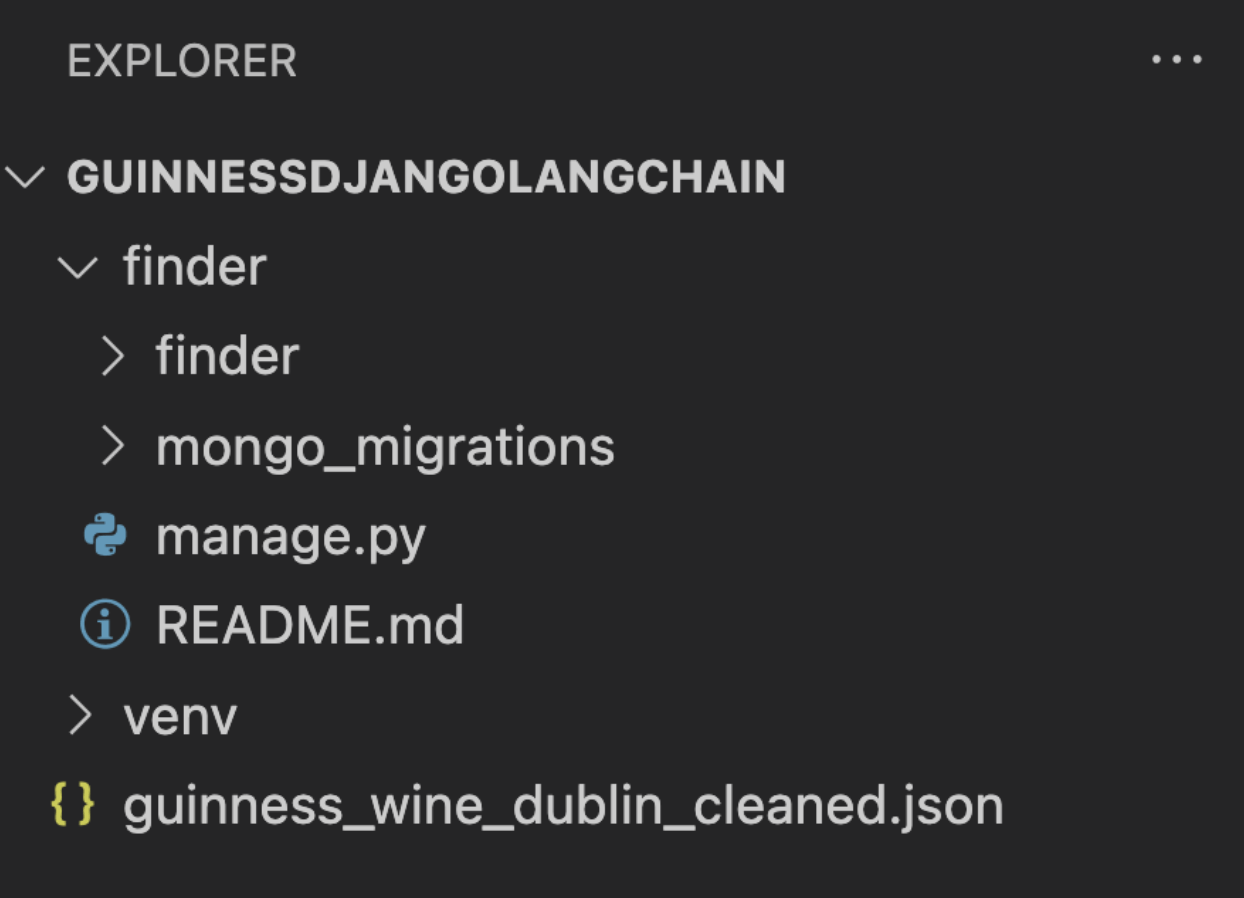
Once run, we can see our file breakdown on the left-hand side of the project file:
Once we can see our project, we can update our database settings. Open up the finder file, select the settings.py file, and scroll down to the DATABASES setting. Please replace the “” with the specific cluster URI including the name of the sample database we are using. Mine looks like this:
DATABASES = {
   "default": django_mongodb_backend.parse_uri("mongodb+srv://<user>:<password>@cluster0.ytyyt.mongodb.net/dublinfinder?retryWrites=true&w=majority&appName=Cluster0"),
}
Once the connection string is properly in place, cd back into finder, or whatever the name of your root is.
Once you’re there, run this command:
python manage.py runserver
If properly connected, this will show that you have unapplied migrations and there will be a link. At that link, http://127.0.0.1:8000/, this screen will appear:
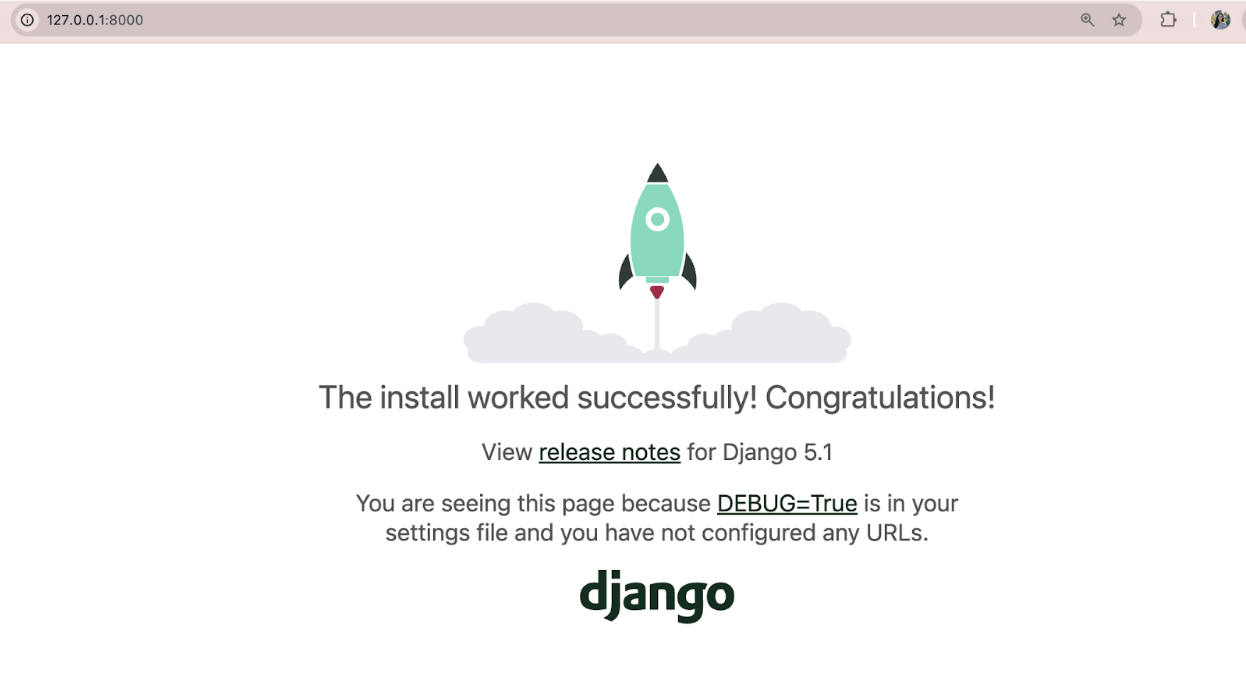
This is confirmation that the setup of our project has been successful! Now, we can create an actual application. Luckily, we have another template that can help us accomplish this.
Step 2: Create Django application
Make sure you’re at the root of your project (in my case, finder) and run the following command to create an application based on the MongoDB template. I am naming it dublinfinder:
python manage.py startapp dublinfinder --template https://github.com/mongodb-labs/django-mongodb-app/archive/refs/heads/5.0.x.zip
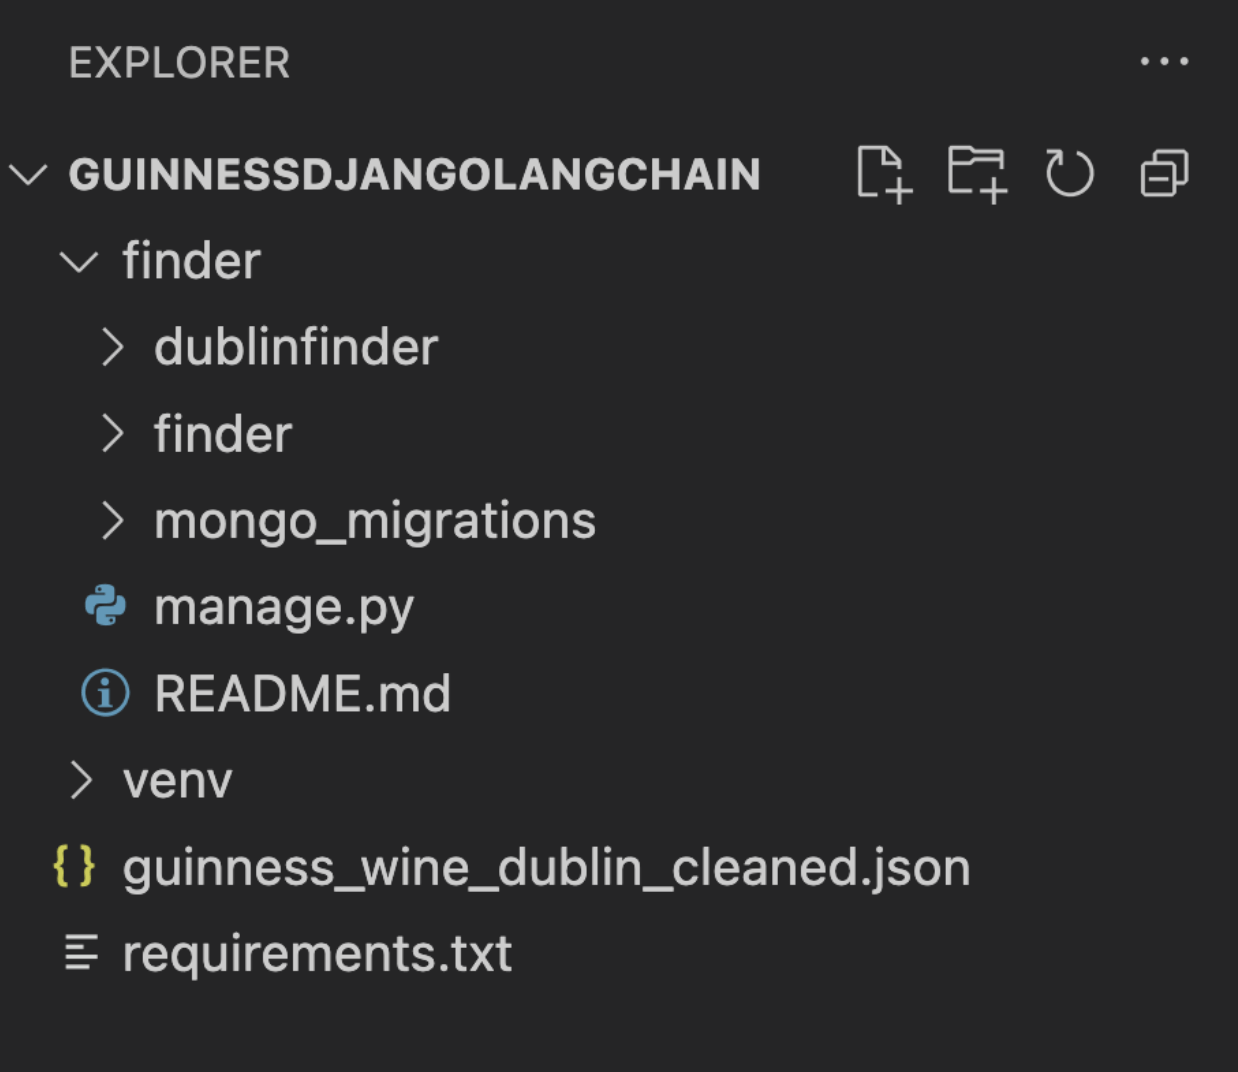
Once that’s correctly been downloaded, it’ll appear on the left-hand side of your project directory.
Step 3: Creating our models
Now that it’s been created, we can create our models.py file. Django models are especially useful since they define the structure of our data based on our JSON format. To have a better understanding of our raw data, let’s quickly take a look at one example:
{
     "types": [
       "pub",
       "bar",
       "clothing_store",
       "store",
       "restaurant",
       "food",
       "point_of_interest",
       "establishment"
     ],
     "formattedAddress": "47-48 Temple Bar, Dublin 2, D02 N725, Ireland",
     "displayName": {
       "text": "The Temple Bar Pub",
       "languageCode": "en"
     },
     "reviews": "Best Irish Pub atmosphere Ive been too in ages! \n This location is well renowned around the world for all the smiles, happy vibes it procures but especially because of all the famous people who have been here as visitors or to perform. \n The food is also very good and the staff really nice, polite and efficient. \n Decorated like a true Irish pub with great live music always playing! \n FYI: There is an ATM machine in the basement beside the washrooms if you ever need real cash money. \n GOOD JOB TL;DR: The Original Temple Bar Pub in Dublin is a lively spot with great service, live music, and a fun crowd. A must-visit on any pub crawl! \n The Original Temple Bar Pub was a fantastic stop on our afternoon Dublin pub crawl. The atmosphere was lively, even on a Tuesday afternoon, with great live music adding to the experience. \n Our server, Dylan, was excellent, attentive, friendly, and even gave us great recommendations for our next stops. We also had a great chat with Ian K, which made the visit even more enjoyable. \n If you're looking for a classic Dublin pub experience with great service and entertainment, this is a must-visit! We stopped in because the outside of the building was decorated amazingly for Christmas, and we wanted a warm drink. The inside was also decorated well, the service was excellent,  and the food and drinks were great.  We ordered the cheese board and a hot chocolate with a shot of Bailey's Irish Cream. \n The cheese board came with 5 types of cheese, grapes, apples,  nuts, crackers,  and bread. It was also served with honey and another tomato-based sauce.  It was the perfect midday snack. \n The service was quick, and the live music was entertaining.  This is one of my new favorite places. The Temple Bar Pub is a decent enough Irish pub with a lively atmosphere and great live music. Its undoubtedly one of the most famous spots in Dublin, and the energy inside reflects that. The musicians were talented, and the overall vibe was enjoyable. \n That said, its extremely touristy which is expected given its location. If you're looking for an authentic, local pub experience, this probably isnt the place. The biggest downside? The price. Paying 12 for a pint of Guinness felt excessive, even by Dublin standards. \n Worth a visit for the experience, but be prepared to pay a premium for it. Visiting the Temple Bar was an unforgettable experience! The atmosphere was vibrant and lively, with people from all over the world coming together to enjoy the iconic spot. The live music added an incredible charm, showcasing talented local artists playing everything from traditional Irish folk to upbeat contemporary tunes. \n The bar offers an extensive selection of drinks almost overwhelming in the best way! We stuck to local beers, which didnt disappoint. Each sip was a true taste of Irelands brewing craft. While it was a bit pricey (as expected for such a famous spot), its absolutely worth it for the experience alone. \n Fun fact: The Temple Bar has been serving visitors for over 170 years, and despite its name, its not actually a temple! The name comes from Sir William Temple, who owned land in the area in the 17th century. Another fascinating tidbit Temple Bar is home to one of Irelands largest whiskey collections, so if youre a fan of whiskey, its a must-try. \n Did you know that the surrounding Temple Bar district is considered the cultural quarter of Dublin? Its filled with galleries, street performers, and quirky shops, making it the perfect area to explore before or after your visit to the bar. \n All in all, its a must-visit spot for anyone wanting to soak up Dublins unique character, music, and local flavors!"
   },
So we want to ensure that each document represents a “Place” with:
- A list of types (array of strings).
- A formatted address (a string).
- A nested
displayName(this will be our embedded document). - A reviews field (long text field that will later be used to generate embeddings).
- An embedding field (
voyage_embedding—this will store the embeddings we generate).
For help on structuring the models.py file, I recommend taking a look at our Raw Database Queries docs.
Our models.py file will look something like this:
from django.db import models
from django_mongodb_backend.fields import ArrayField, EmbeddedModelField
from django_mongodb_backend.models import EmbeddedModel
from django_mongodb_backend.managers import MongoManager

# embedded, so it doesn't have its own collection
class DisplayName(EmbeddedModel):
   text = models.CharField(max_length=200)
   languageCode = models.CharField(max_length=10, blank=True, null=True)

# main model is our Places.
class Place(models.Model):
   types = ArrayField(models.CharField(max_length=50), blank=True, null=True)
   formattedAddress = models.CharField(max_length=300, blank=True, null=True)
   displayName = EmbeddedModelField(DisplayName, blank=True, null=True)
   reviews = models.TextField(blank=True, null=True)
   # this is where our embedding will go when generated.
   embedding = ArrayField(models.FloatField(), blank=True, null=True)

   objects = MongoManager()

   class Meta:
       db_table = "places"
       managed = False

   def __str__(self):
       return self.displayName.text
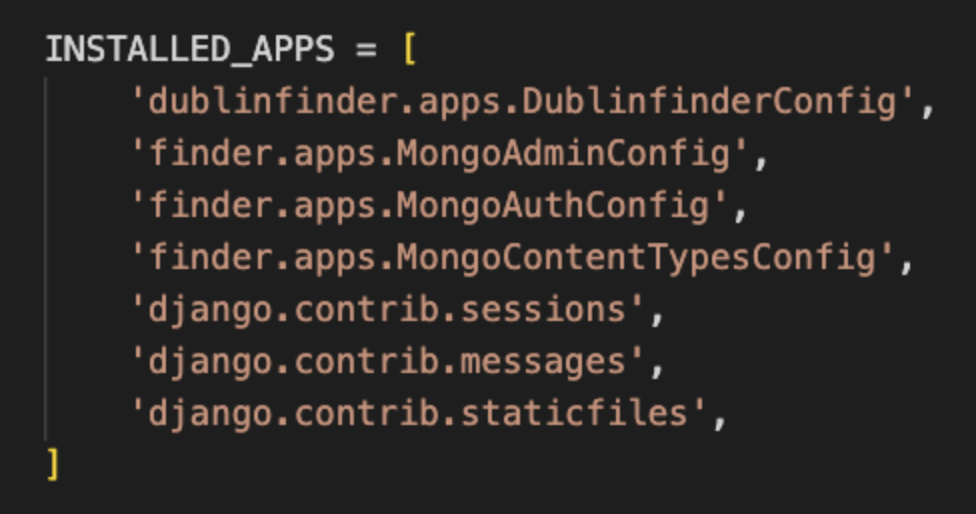
Once our models.py file is saved, we need to add our new application to the finder/settings.py file. Find the INSTALLED_APPS area and add in the new application. The name for this tutorial is dublinfinder.apps.DublinfinderConfig.
Now, we have our application started up, and we could essentially start putting in our views and urls and creating our templates, but we still need to embed our “reviews” field and put the data we are going to be working with into our MongoDB Atlas cluster. So let’s do that first and then we can go back.
Step 4: Embedding with Voyage AI
Please make sure you have a Voyage AI API key.
Create a new file in your project named .env and place your API key in it using VOYAGE_API_KEY. Once that’s set, create another file named reviews_embedding.py where we can put the script we will use to embed the reviews field of our JSON file.
import json
import voyageai

# using our API key
vo = voyageai.Client()

with open("guinness_wine_dublin_cleaned.json", "r") as f:
   data = json.load(f)

# focusing on "reviews" field since that's what we are embedding
reviews_list = [place.get("reviews", "") for place in data.get("places", [])]

# getting embeddings for the reviews using "voyage-3-lite"
result = vo.embed(reviews_list, model="voyage-3-lite", input_type="document")

# new field to hold the embeddings
for place, embedding in zip(data.get("places", []), result.embeddings):
   place["embedding"] = embedding

# writing embeddings back to a new file
with open("embedded_guinness_wine_dublin_cleaned2.json", "w") as f:
   json.dump(data, f, indent=2)
Here, we are setting our key, opening up our JSON file that’s already in our project, embedding the reviews field using Voyage AI’s “voyage-3-lite” embedding model, creating a new field to hold the embedding (that has the same name as what we clarified when creating our models.py file), and then creating a new JSON file that has the embeddings as a field. We want to save this to a new file so that we can upload that file to our MongoDB cluster.
Run the file using:
python reviews_embedding.py
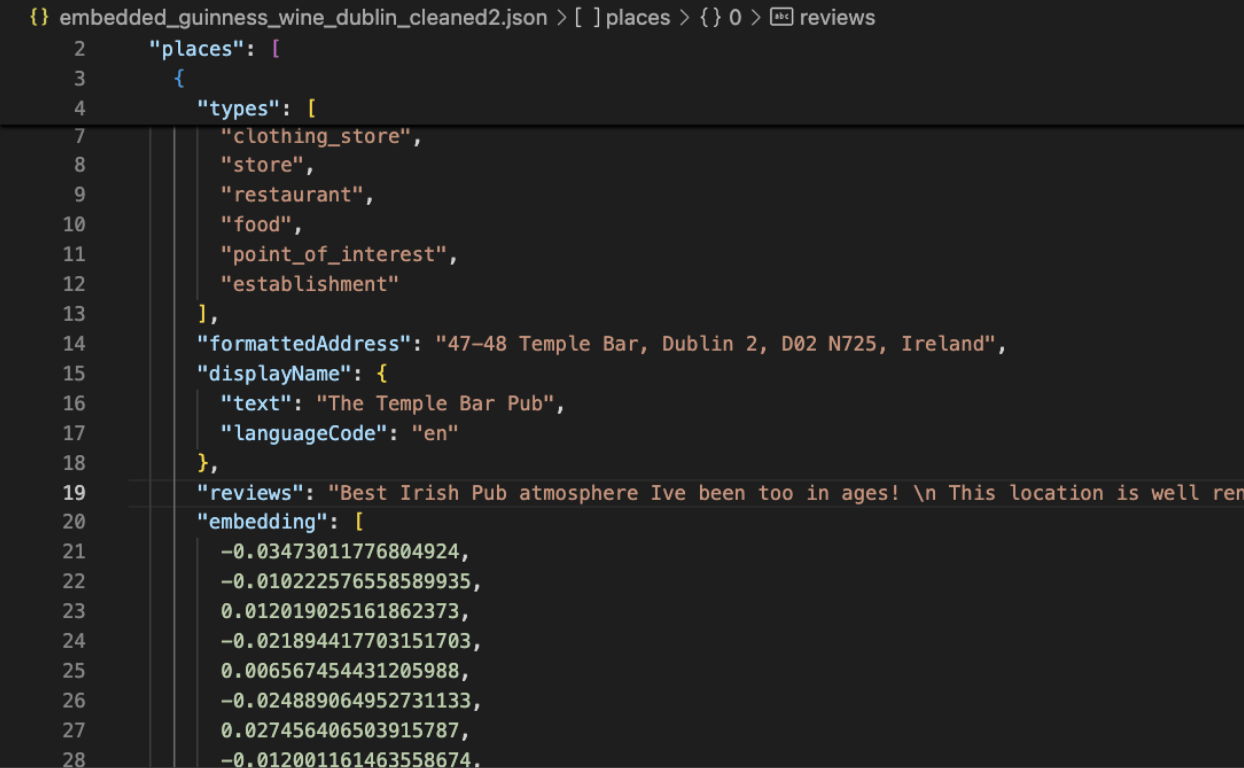
When the new file is opened up, we can see our Voyage AI embeddings!
Once we have our embedded field ready, we can insert our documents into our MongoDB cluster.
Step 5: Inserting data into the MongoDB cluster
Because of the django-mongodb-backend installation, we already have pymongo downloaded in our environment, and we should have python-dotenv downloaded as well since we set it in the requirements.txt file above. Just to be sure, run this command in the root of your project:
pip install pymongo python-dotenv
Make sure to update your .env file as well with your MongoDB connection string. Please make sure to include the username, password, and database name in the connection string.
An example of how this will look in the .env file is:
MONGO_URI=“mongodb+srv://mongodb:<db_password>@cluster0.ytyyt.mongodb.net/<database>?retryWrites=true&w=majority&appName=Cluster0”
Once the connection string is safe in the .env file, we can create a new file at the root of the project named json_upload.py.
import json
import os
from pymongo import MongoClient
from dotenv import load_dotenv

load_dotenv()

# get the environment variable and connect
connection_string = os.getenv("MONGO_URI")
connect = MongoClient(connection_string)

# specify our database and collection
database = connect["dublinfinder"]
collection = database["placesinfo"]

# load in our json file
with open("embedded_guinness_wine_dublin_cleaned2.json", "r") as file:
   data = json.load(file)

# our json file starts with "places" so this is just making sure it fits
if isinstance(data,dict) and "places" in data:
   places = data["places"]

# use insert_many since we have 40 docs
result = collection.insert_many(places)
Run this file and check your MongoDB cluster:
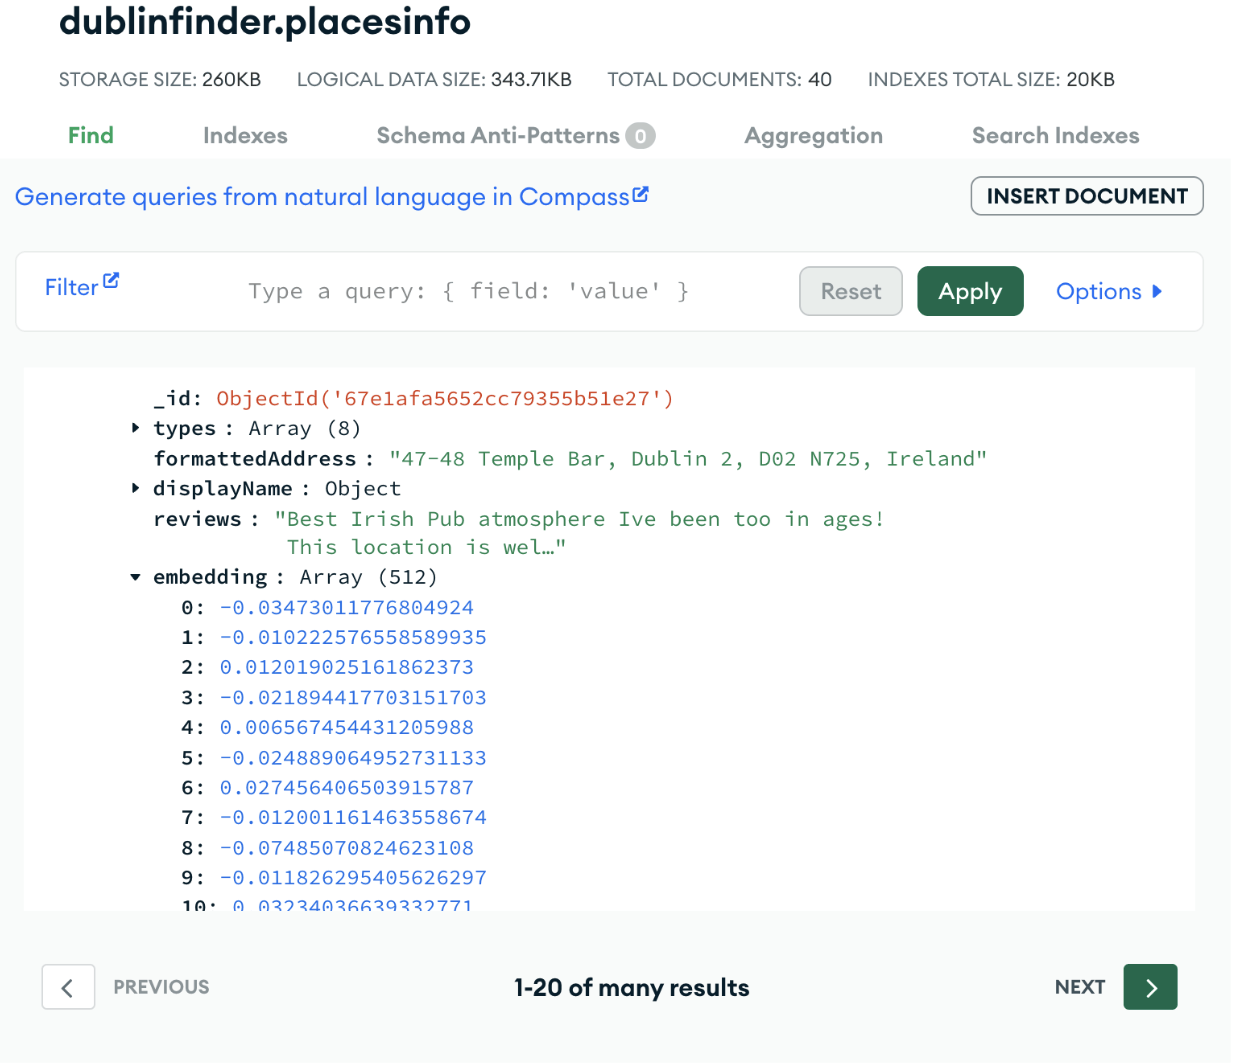
As we can see, our data is saved in our cluster with our Voyage AI embeddings!
Now that we have successfully stored our data, we can get started on writing a script using the langchain-mongodb package to do some fun semantic search.
Step 6: LangChain-MongoDB
We want to integrate MongoDB Atlas Vector Search with LangChain to really get the most out of our embedded reviews.
Double check the requirements.txt file and make sure you have both the langchain-voyageai package and the langchain-mongodb package.
Before we continue with writing up our script, let’s first create our Atlas Vector Search index.
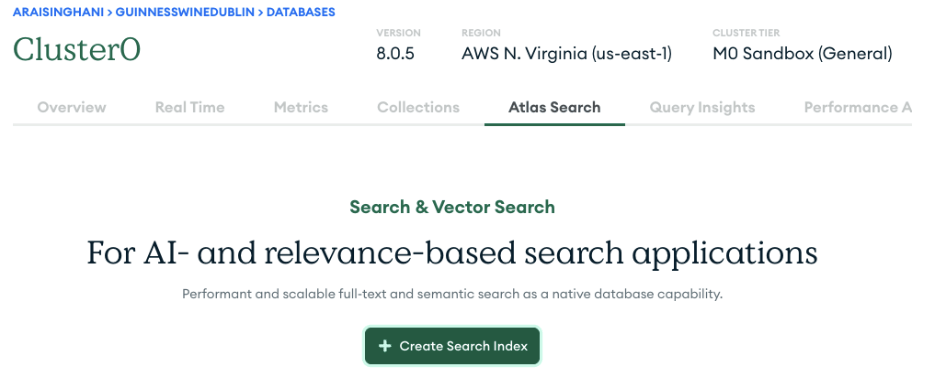
Do this by going into your cluster, clicking on the Atlas Search tab, and clicking on the green “Create Search Index” button.
Make sure to choose the “Vector Search” index. Keep the default name of the index of “vector_index” (or if you decide to change it, make sure this change is deployed across all necessary areas), and choose the database and collection our data is stored in.
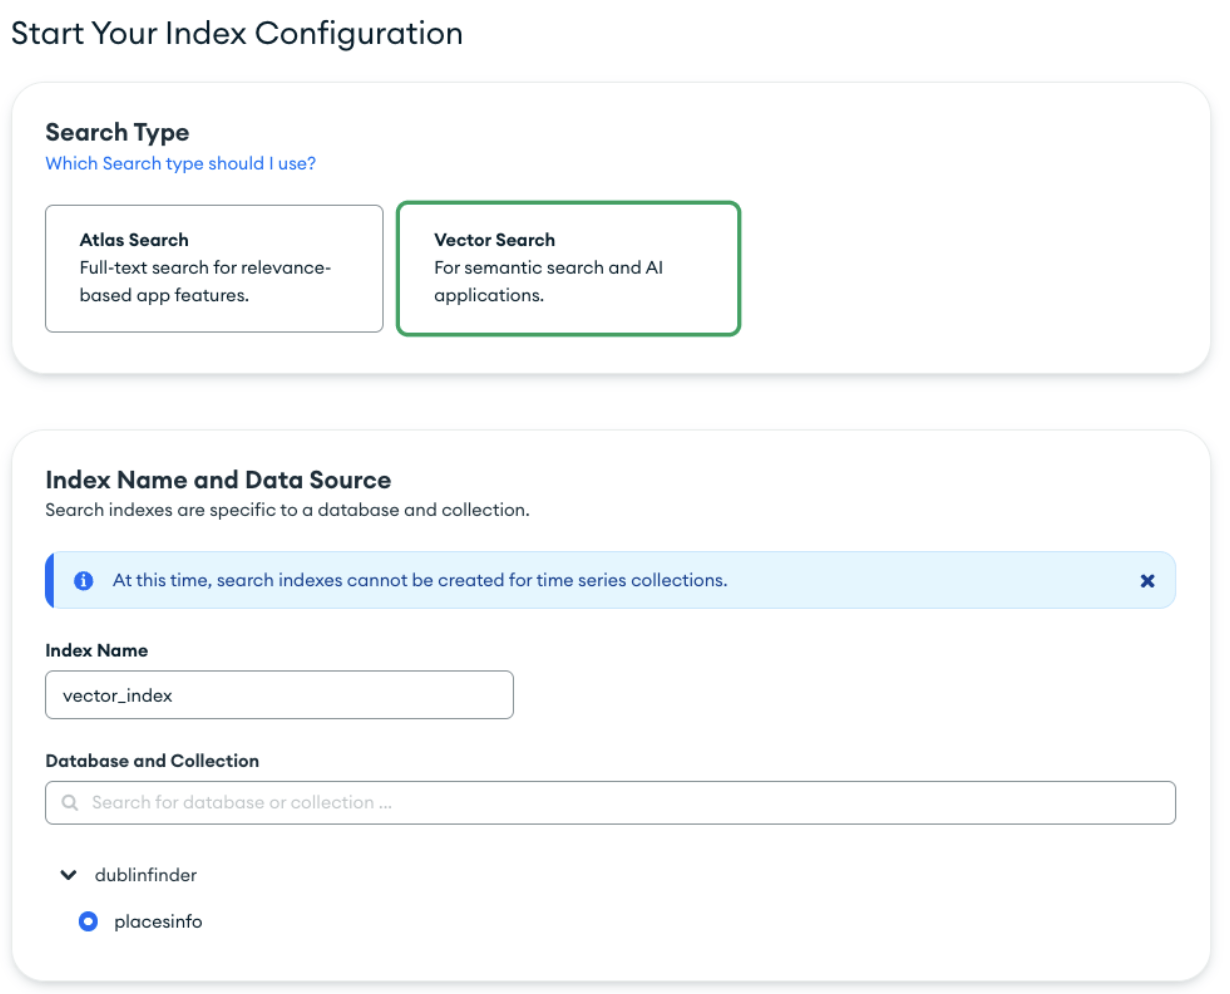
Click the “Next” button.
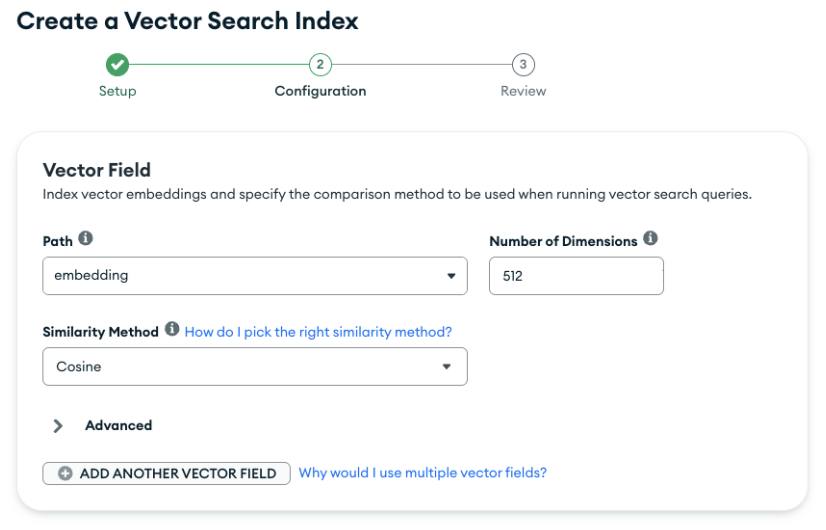
Choose the path that contains the array of vector embeddings—it should be “embedding.” The number of dimensions is 512 because we used Voyage AI’s voyage-3-lite. If choosing a different model, please read up on Voyage AI’s text embeddings documentation to ensure you’re choosing the correct dimensions. For the similarity method, we are using cosine.
Once all that information is in, click “Next.” Review your Vector Search index on the page that pops up, and if all the information is correct, click “Create Vector Search Index.”
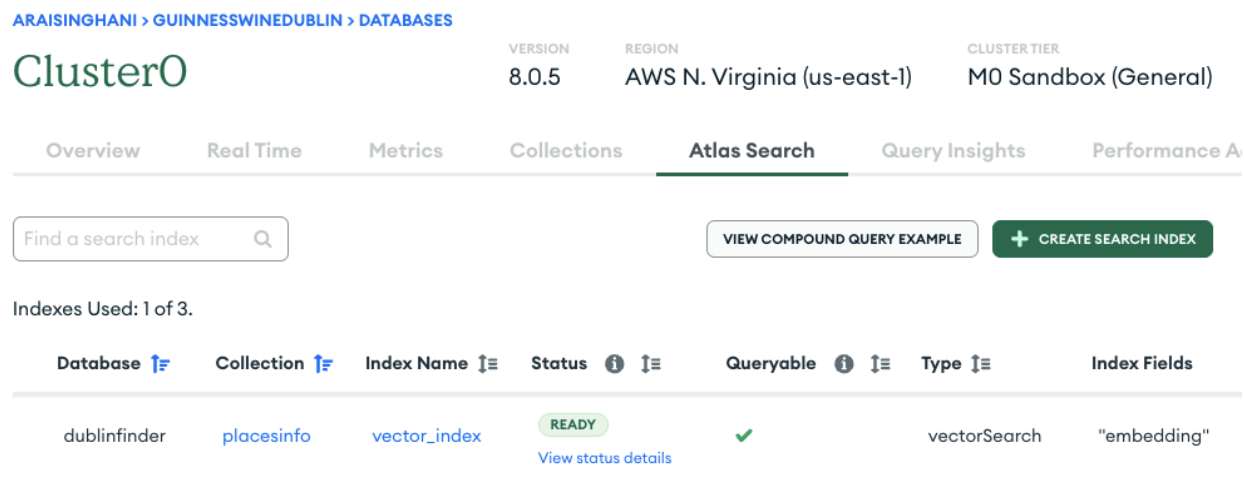
When the Vector Search index is ready, you’ll see a status change. Once that is up and running, let’s create our script to put everything to use.
Create a new file in your project’s root and name it langchain_integration.py. We are using an embeddings object from the the Voyage AI documentation. It looks like this:
from langchain_voyageai import VoyageAIEmbeddings
embeddings = VoyageAIEmbeddings(
    voyage_api_key="[ Your Voyage API key ]", model="voyage-law-2"
)
And we are using the Vector Store sample code from MongoDB’s documentation. It looks like this:
from langchain_mongodb.vectorstores import MongoDBAtlasVectorSearch
from pymongo import MongoClient

# Use some embedding model to generate embeddings
from tests.integration_tests.vectorstores.fake_embeddings import FakeEmbeddings

# Connect to your Atlas cluster
client = MongoClient("<connection-string>")
collection = client["<database-name>"]["<collection-name>"]

# Instantiate the vector store
vector_store = MongoDBAtlasVectorSearch(
   collection = collection,        # Collection to store embeddings
   embedding = FakeEmbeddings(),   # Embedding model to use
   index_name = "vector_index",    # Name of the vector search index
   relevance_score_fn = "cosine"   # Similarity score function, can also be "euclidean" or "dotProduct"
)
We will be connecting these two but changing a couple crucial aspects. The first thing we are changing is we are connecting from our connection string, so that needs to be added in. This means we are changing up parts from the Vector Store example code:
# vector store with our embeddings model
vector_store = MongoDBAtlasVectorSearch.from_connection_string(
   connection_string=connection_string,
   namespace=namespace,
   embedding_key="embedding",
   index_name="vector_index",
   text_key="reviews",
   embedding=embeddings
)
Please make sure to include the connection_string, the namespace, the embedding_key, and the text_key. Our text_key is our reviews.
Let’s put it all together:
import os
from dotenv import load_dotenv
from langchain_voyageai.embeddings import VoyageAIEmbeddings
from langchain_mongodb.vectorstores import MongoDBAtlasVectorSearch
from pymongo import MongoClient
load_dotenv()
voyage_api_key = os.getenv("VOYAGE_API_KEY")
connection_string = os.getenv("MONGO_URI")
# this is our embeddings object.
embeddings = VoyageAIEmbeddings(
voyage_api_key=voyage_api_key,
model="voyage-3-lite"
)
# this is your database.collection
namespace = "dublinfinder.placesinfo"
# vector store with our embeddings model
vector_store = MongoDBAtlasVectorSearch.from_connection_string(
connection_string=connection_string,
namespace=namespace,
embedding_key="embedding",
index_name="vector_index",
text_key="reviews",
embedding=embeddings
)
# similarity search
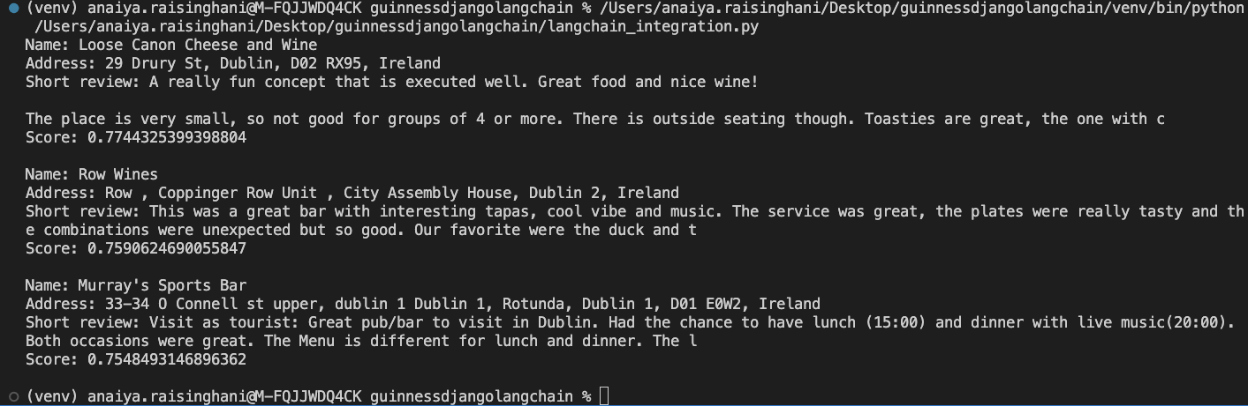
query = "I want to enjoy a Guinness outside. With some yummy food"
# LangChain automatically handles embedding the query
results = vector_store.similarity_search_with_score(query, k=3)
# post-process and make it look pretty
for doc, score in results:
name = doc.metadata.get("displayName", {}).get("text", "Unknown")
address = doc.metadata.get("formattedAddress", "Unknown")
review_text = doc.page_content
short_review = review_text[:200]
print(f"Name: {name}")
print(f"Address: {address}")
print(f"Short review: {short_review}")
print(f"Score: {score}")
print()
If you look at the difference between the sample code we are working with and the code in our script, you will notice a handful of differences. This is because we need to account for entering our documents into our vector store, and this is done by using the connection_string method.
Awesome! We have great results when we run the query: ““I want to enjoy a Guinness outside. With some yummy food”
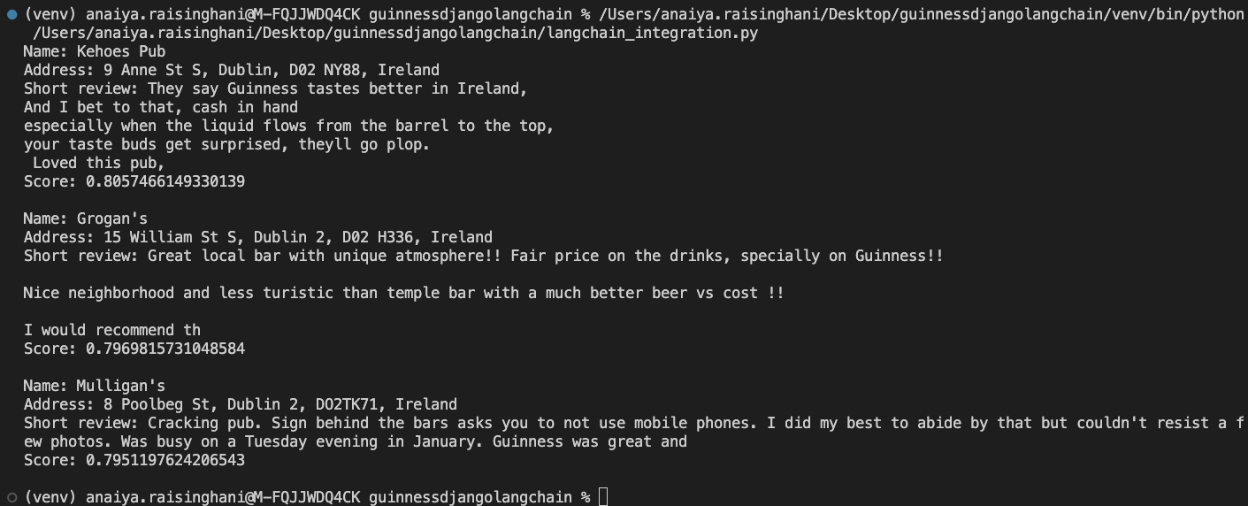
Let’s run one more query just to test if our results are accurate. Let’s chat about wine bars and cocktails.
I ran the query: “Wine bar with snacks and outdoor seating”
Awesome! Now, let’s work on incorporating this integration into our Django application, and finishing up all the other necessary Django files.
Step 7: Django
Our first step is to edit our views.py file. We already have our langchain_integration.py file, so now we need to transfer it over to our views.py file. The only difference here is that we are going to prompt for the query instead of hard coding it. Copy in the views.py file like this:
from django.shortcuts import render
import os
from dotenv import load_dotenv
from langchain_voyageai.embeddings import VoyageAIEmbeddings
from langchain_mongodb.vectorstores import MongoDBAtlasVectorSearch

load_dotenv()

def search_places(request):
   # get query from user
   query = request.GET.get("query", "")
   results = []

   # same from our langchain_integration.py file
   if query:
       # use our API keys
       voyage_api_key = os.getenv("VOYAGE_API_KEY")
       connection_string = os.getenv("MONGO_URI")

       # this is our embeddings object.
       embeddings = VoyageAIEmbeddings(
           voyage_api_key=voyage_api_key,
           model="voyage-3-lite"
       )

       # this is your database.collection
       namespace = "dublinfinder.placesinfo"

       # vector store with our embeddings model
       vector_store = MongoDBAtlasVectorSearch.from_connection_string(
           connection_string=connection_string,
           namespace=namespace,
           embedding_key="embedding",
           index_name="vector_index",
           text_key="reviews",
           embedding=embeddings
       )

       # similarity search, LangChain handles embedding the query
       results_with_scores = vector_store.similarity_search_with_score(query, k=3)

       # post-process and make it look pretty
       processed_results = []
       maximum_char = 800

       for doc, score in results_with_scores:
           name = doc.metadata.get("displayName", {}).get("text", "Unknown")
           address = doc.metadata.get("formattedAddress", "Unknown")
           review_text = doc.page_content if doc.page_content else ""

           # refining it so we don't end in the middle of a sentence
           if len(review_text) > maximum_char:
               shortened = review_text[:maximum_char]
               last_period = shortened.rfind('.')
               if last_period != -1:
                   review = shortened[:last_period+1]

           processed_results.append({
               "name": name,
               "address": address,
               "review": review,
               "score": score
           })

       results = processed_results

   # template
   return render(request, "search_results.html", {"results": results, "query": query})
I also went ahead and added in a couple extra lines to make sure our reviews stopped at a period and not in the middle of a sentence. This is just for aesthetic reasons.
Now, we need to create our template. Create a new folder named templates and create a search_results.html file inside. Here is where you can put all your CSS and HTML to curate exactly how you’d like the front page of your site to look!
<!DOCTYPE html>
<html>
<head>
   <title>Dublin City Center Pub Finder</title>
   <!-- Import Lexend Deca font -->
   <link href="https://fonts.googleapis.com/css2?family=Lexend+Deca&display=swap" rel="stylesheet">
   <style>
       body {
           background-color: #0B3D0B; /* Dark green background */
           color: #ffffff;           /* White text */
           font-family: 'Lexend Deca', sans-serif;
           margin: 0;
           padding: 0;
       }
       .container {
           display: flex;
           flex-direction: column;
           align-items: center;
           min-height: 100vh;
           padding: 20px;
       }
       .header {
           font-size: 3em;
           margin-bottom: 20px;
           color: #ACE1AF; /* Light green for headings */
           text-align: center;
       }
       form {
           margin-bottom: 20px;
       }
       input[type="text"] {
           width: 300px;
           padding: 10px;
           border: none;
           border-radius: 4px;
           margin-right: 10px;
       }
       button[type="submit"] {
           padding: 10px 20px;
           background-color: #006400; /* Darker green */
           color: #ffffff;
           border: none;
           border-radius: 4px;
           cursor: pointer;
       }
       button[type="submit"]:hover {
           background-color: #008000;
       }
       .results {
           width: 80%;
           margin-top: 40px;
       }
       ul {
           list-style: none;
           padding: 0;
       }
       li {
           background-color: #013220; /* Dark green shade */
           margin-bottom: 15px;
           padding: 15px;
           border-radius: 5px;
       }
       .name {
           margin-bottom: 10px;
           font-weight: bold;
           color: #7FFF00;
       }
       .address, .review, .score {
           margin-bottom: 10px;
           font-weight: bold;
       }

       p {
           margin-top: 20px;
       }
   </style>
</head>
<body>
   <div class="container">
       <!-- Landing Page Header -->
       <div class="header">Dublin City Center Pub Finder</div>
       <!-- Search Form -->
       <form method="GET" action="{% url 'search_places' %}">
           <input type="text" name="query" value="{{ query }}" placeholder="Enter your query here">
           <button type="submit">Search</button>
       </form>
       <!-- Display Results if a Query is Present -->
       {% if query and results %}
           <div class="results">
               <h2>Results for "{{ query }}"</h2>
               <ul>
                   {% for place in results %}
                       <li>
                           <div class="name">{{ place.name }}</div>
                           <div class="address">Address: {{ place.address }}</div>
                           <div class="review">Review (excerpt): {{ place.review }}</div>
                           <div class="score">Similarity Score: {{ place.score }}</div>
                       </li>
                   {% endfor %}
               </ul>
           </div>
       {% elif query %}
           <p>No results found for "{{ query }}".</p>
       {% endif %}
   </div>

</body>
</html>
Once that’s in place, we can connect our URL so we have someplace to actually go.
Go over to the urls.py file and edit it like this:
from django.contrib import admin
from django.urls import path
from dublinfinder import views

urlpatterns = [
   path('admin/', admin.site.urls),
   path('search/', views.search_places, name='search_places'),
   path('', views.search_places, name='search_places')
]
This is just saying that when you open up the webpage, you’ll immediately see the text box prompting you to put in your query, and you’ll see the same if you type search/ at the end of the URL.
Go to where your manage.py file is located and run the command:
python manage.py runserver
Click on http://127.0.0.1:8000/ and search for a place!
My query is: “Guinness with outdoor seating”.
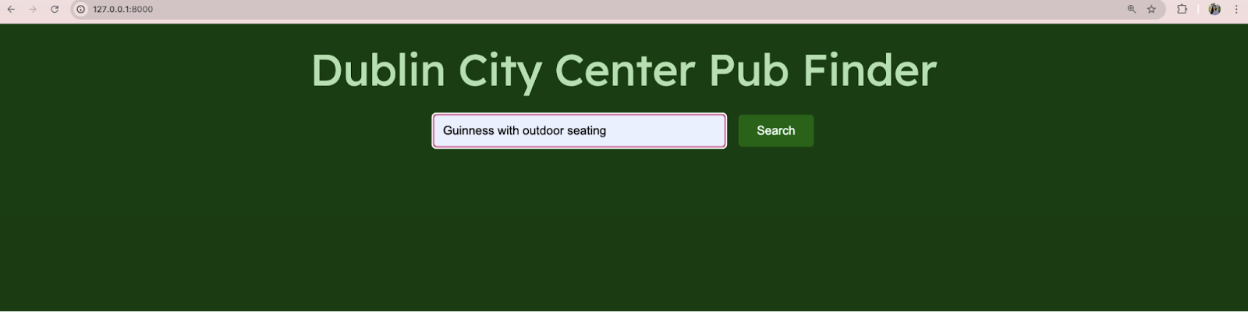
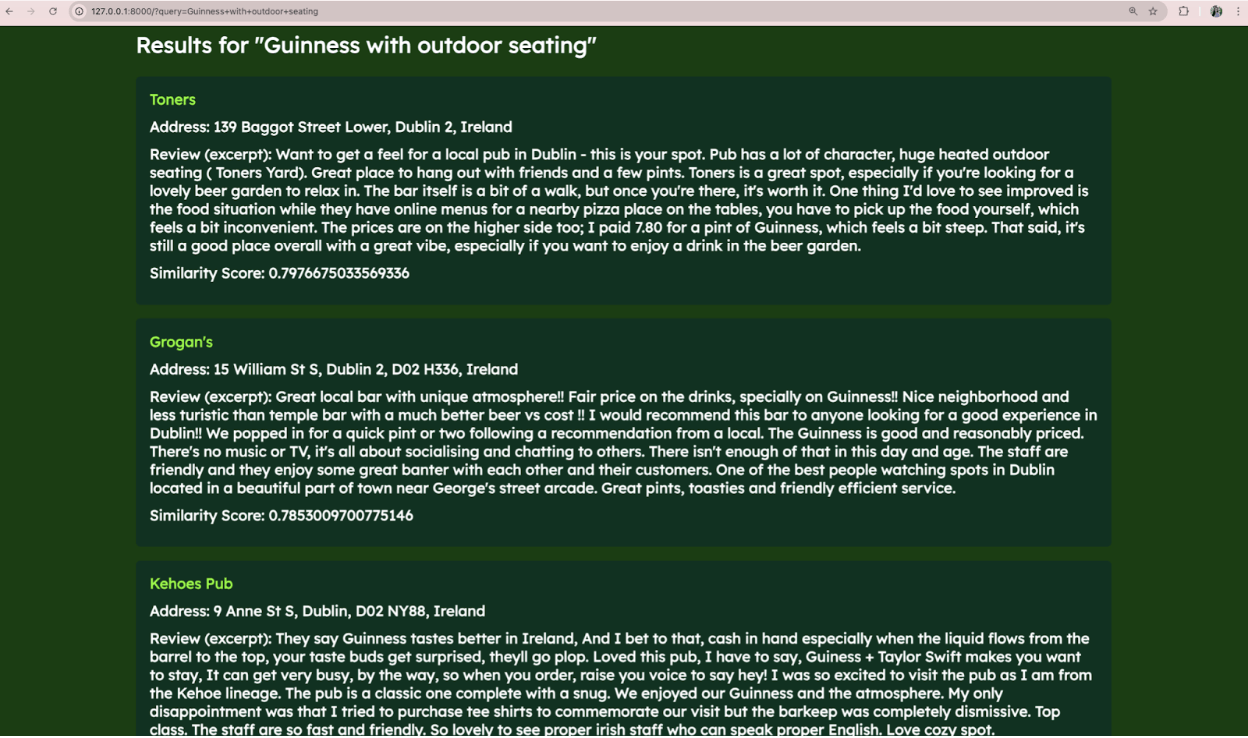
We have three great options to choose from!
Conclusion
Congratulations on building your own Dublin City Center Pub Finder! It’s partly a side project, partly an excuse to experience Dublin, and 100% built with tools that I’m super excited about: Django MongoDB Backend, Voyage AI, and LangChain.
Whether you’re building competitive AI applications, or just looking for a fun place to grab a drink, I hope this tutorial shows how powerful (and fun!) the intersection between Django, MongoDB, and AI is.
If you find yourself in Dublin for DjangoCon Europe, come see my talk.
Clone the GitHub repo for this project from our Gen AI Showcase!
For questions, please check out our MongoDB Developer Forum.
This content first appeared on DEV.

Anaiya Raisinghani
Anaiya Raisinghani is a Masters student at the University of Southern California studying Industrial and Systems Engineering. She is interested in databases, machine learning, and natural language processing. This summer, she is interning at MongoDB as a Developer Advocacy Intern. In her free time, you can find her watering her plants or exploring San Francisco.
Follow Us

Support This Site
If you found this developer resource helpful, please consider supporting it through the following options:


